Desert Bloom Market Bag Free Pattern – Knit a Textured Tote
Desert Bloom Market Bag Free Pattern – Knit a Textured Tote
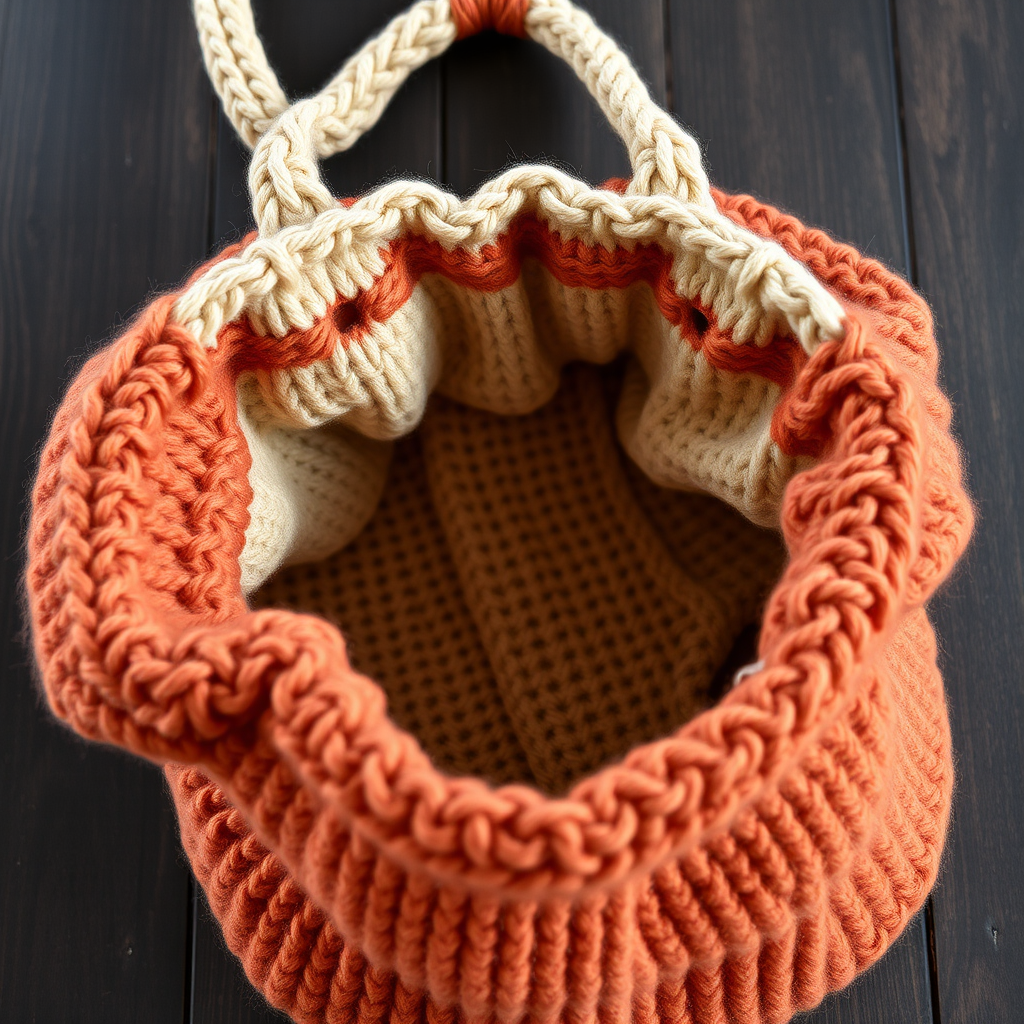
Carry a piece of the desert with this richly textured, boho-inspired market bag. Knitted in warm terracotta and sand tones, this tote is as stylish as it is sturdy. The subtle woven-like texture, created by alternating knit and purl stitches, gives it an artisanal, handcrafted feel that elevates any outfit. Whether you're heading to the farmer's market, the beach, or just out for a stroll, this roomy, slouchy bag is the perfect companion. Best of all, this is a free pattern designed with beginners in mind—clear instructions and simple techniques make it an enjoyable and rewarding project.
This pattern uses worsted weight cotton yarn, which provides excellent stitch definition and durability. The combination of a textured body, a contrasting sand-colored top with an eyelet drawstring, and sturdy flat handles creates a bag that is both functional and beautiful. Let's dive in and create your new favorite accessory!
Materials Needed
Before you begin, gather the following materials. Having everything ready will make your knitting experience smooth and enjoyable.
- Yarn: Worsted weight cotton yarn (e.g., Lion Brand 24/7 Cotton) in Terracotta (MC) and Sand (CC). You will need approximately 250g of the main color (MC) and 100g of the contrasting color (CC).
- Needle: US 7 (4.5mm) circular knitting needle, 24-inch length. The circular needle is essential for working the bag body in the round.
- Notions: Stitch marker, tapestry needle for weaving in ends and sewing handles, scissors.
- Gauge: 18 stitches and 24 rows = 4 inches in stockinette stitch. Always check your gauge to ensure your bag turns out the correct size.
Step-by-Step Instructions
This pattern is worked in the round from the bottom up, creating a seamless bag body. Follow each step carefully, and you'll have a beautiful, professional-looking tote in no time.
Bag Body (Worked in the Round)
This section creates the main body of the bag, starting with a firm base edge and moving into the textured pattern.
- Cast On and Join: With your main color (MC), cast on 80 stitches. Place a stitch marker to mark the beginning of the round, and join in the round, being very careful not to twist your stitches. The cast-on edge should form a neat circle.
- Base Edge: Work in garter stitch for 6 rounds to create a firm, stable base edge. Garter stitch in the round is achieved by knitting one round, then purling the next round. Repeat this sequence (knit round, purl round) three times total to complete 6 rounds.
- Begin Textured Pattern: Now you'll start the beautiful woven-like texture. Repeat these 4 rounds until the bag measures 10 inches from the cast-on edge:
- Round 1: *K2, P2* repeat from * to end of round.
- Round 2: Knit all stitches.
- Round 3: *P2, K2* repeat from * to end of round.
- Round 4: Knit all stitches.
- Switch to Contrasting Color: Cut the MC yarn, leaving a tail for weaving in later. Join your contrasting color (CC) yarn. Work in stockinette stitch (which in the round is simply knitting every round) for 2 inches. This creates a smooth, solid band at the top of the bag.
- Eyelet Round: This round creates the holes for your drawstring. *K2, YO (yarn over), K2tog (knit two together)* repeat from * to end of round. The yarn over creates a new hole, and the knit two together decreases one stitch to maintain your stitch count. This will result in a row of neat, small holes around the bag.
- Continue in CC: After the eyelet round, continue working in stockinette stitch (knit every round) with the CC yarn for 1 more inch.
- Bind Off: Bind off all stitches loosely. A loose bind-off is crucial so the top of the bag can stretch and gather nicely with the drawstring. You can use a larger needle to bind off if you find your bind-off is too tight.
Drawstring
The drawstring is a simple I-cord that threads through the eyelet holes to cinch the bag closed.
- Cast On: With MC yarn, cast on 3 stitches onto a double-pointed needle (or your circular needle if you prefer).
- Work I-Cord: Knit these 3 stitches. Do not turn your work. Instead, slide the stitches to the other end of the needle, pull the yarn tightly across the back, and knit the 3 stitches again. Repeat this process until the I-cord measures 30 inches long. This creates a sturdy, round cord.
- Bind Off: Bind off the 3 stitches. Weave in the ends securely.
- Thread the Drawstring: Starting at the front center of the bag, weave the I-cord in and out of the eyelet holes all the way around. When you return to the front, both ends of the cord should be on the outside of the bag. Tie a knot at each end of the cord to prevent it from slipping back through the holes.
Handles (Make 2)
These flat, sturdy handles are worked flat and then sewn securely to the inside of the bag.
- Cast On: With MC yarn, cast on 8 stitches onto your circular needle (or straight needles if you have them).
- Work Stockinette: Work in stockinette stitch (knit one row, purl one row) until the handle measures 12 inches long. Keep your tension even for a neat, uniform handle.
- Bind Off: Bind off all stitches. Weave in the ends.
- Attach Handles: Position each handle on the inside of the bag, placing them 4 inches apart on each side. For example, if the front of the bag is centered, place one handle edge 2 inches to the left of center and the other edge 2 inches to the right of center. Sew each end of the handle securely to the inside of the bag using a tapestry needle and the yarn tails. Make sure to sew through both the handle and the bag fabric firmly, reinforcing with a few extra stitches for durability.
Finishing
These final steps will give your bag a polished, professional look.
- Weave in All Ends: Use your tapestry needle to carefully weave in all loose yarn ends on the inside of the bag. This ensures your bag is neat and durable.
- Optional Lining: For extra durability and to prevent small items from slipping through the stitches, you can add a fabric lining. Cut a piece of cotton fabric to the bag's dimensions, sew the sides and bottom, and hand-stitch the lining to the inside of the bag just below the eyelet row. This is a great way to add a personal touch with a fun fabric print.
Your Desert Bloom Market Bag is now complete! This textured tote is perfect for carrying groceries, books, or beach essentials. The warm terracotta and sand colors make it a versatile accessory that pairs beautifully with neutral and earthy tones. Enjoy your handmade creation, and don't forget to share your finished bag with the knitting community!


