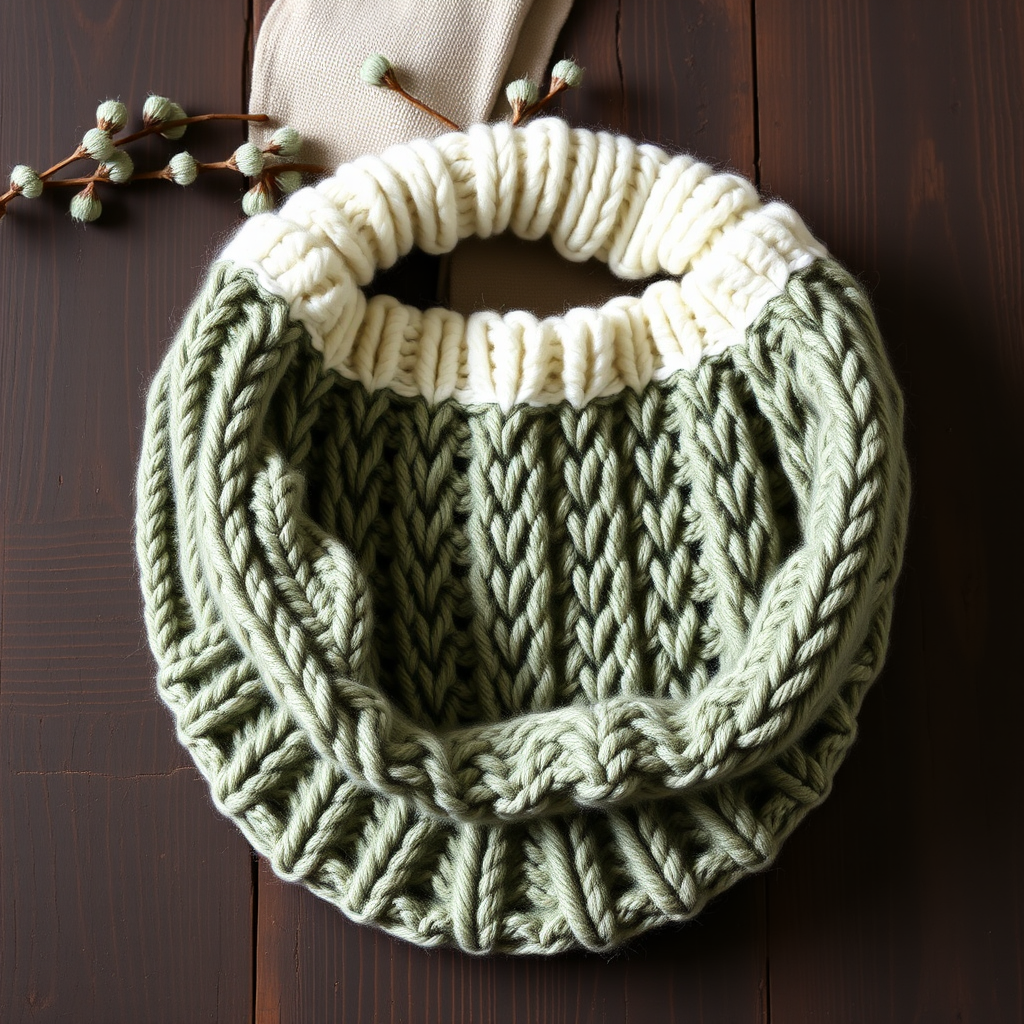
Aurora Ridge Knitted Cowl Free Pattern – Textured Alpine-Inspired Winter Wrap

Wrap Yourself in Alpine Elegance: The Aurora Ridge Knitted Cowl
There are some knitting projects that are more than just accessories—they are experiences. The Aurora Ridge Knitted Cowl is exactly that. This stunning, textured winter wrap blends the plush, squishy comfort of two-color brioche with the bold, sculptural drama of twisted cables. The result is a seamless, reversible masterpiece that evokes misty pine forests and snow-dusted mountain peaks.
Designed to be worked in the round, this cowl is a satisfying project for adventurous beginners and seasoned knitters alike. With a clever combination of slip-stitch brioche and cable panels, you will create a deeply dimensional fabric that is as warm as it is beautiful. Whether you drape it doubled over a coat or slouch it loosely around your neck, the Aurora Ridge Cowl is destined to become the most coveted piece in your winter wardrobe.
In this comprehensive guide, we will walk you through every step, from casting on to the final bind-off, ensuring you can recreate this cozy masterpiece with confidence.
Materials Needed: Gathering Your Mountain Gear
Before you begin your knitting journey, gather the following materials. Using the specified yarn weight and needle size is crucial to achieving the correct gauge and the perfect, lofty drape.
Yarn & Colors
- Yarn Weight: Worsted weight yarn (approx. 300-350 yards total).
- Main Color (MC): Deep Forest Green (approx. 175-200 yards).
- Contrast Color (CC): Soft Cream (approx. 125-150 yards).
Pro-Tip: Choose a yarn with good stitch definition, such as a wool or wool-blend, to make the cables pop and the brioche look plush.
Tools & Notions
- Needle: US 8 (5.0 mm) 16-inch circular knitting needle.
- Notions: Stitch marker (to mark the beginning of the round), cable needle, tapestry needle for weaving in ends.
Gauge
- Gauge: 18 stitches and 24 rows = 4 inches in stockinette stitch (after blocking).
Why Gauge Matters: Matching the gauge ensures your cowl has the correct circumference (approx. 24 inches) and height (approx. 10 inches). If your gauge is off, your cowl may be too tight or too loose. Always knit a swatch first!
Step-by-Step Instructions: Crafting Your Aurora Ridge
This pattern is worked in the round, creating a seamless tube. It combines a two-color brioche stitch with cable panels. Don't be intimidated by the brioche—the instructions below break it down into simple, repeatable rounds.
Special Stitches & Abbreviations
Familiarize yourself with these stitches before you begin. They are the building blocks of the pattern.
- K1TBL: Knit 1 stitch through the back loop (twists the stitch).
- P1TBL: Purl 1 stitch through the back loop (twists the stitch).
- C4F: Slip 2 stitches to cable needle, hold in front, knit 2, knit 2 from cable needle.
- C4B: Slip 2 stitches to cable needle, hold in back, knit 2, knit 2 from cable needle.
- BRK (Brioche Knit): Knit the stitch together with its yarnover (this is the "knit" side of brioche).
- BRP (Brioche Purl): Purl the stitch together with its yarnover (this is the "purl" side of brioche).
Pattern Notes
- The cowl is worked in the round, so it is completely seamless.
- The pattern is reversible, meaning both sides look beautiful and finished.
- Use a stretchy cast-on and bind-off to ensure the cowl fits comfortably over your head.
Cast On & Setup
Let's get started! We'll begin with a neat, stretchy ribbed edge.
- Cast On: With your Main Color (MC), cast on 120 stitches using a long-tail cast-on method. Place a stitch marker and join in the round, being extremely careful not to twist your stitches.
- Ribbing: Work 4 rounds of 2x2 ribbing (knit 2, purl 2) in MC. This creates a sturdy, flexible base for your cowl.
Body of the Cowl: The Brioche & Cable Dance
Now we begin the main pattern. The body is a sequence of rounds that create the brioche texture and the cable ridges. Pay close attention to the color changes and the special stitches.
Round 1 (MC): *K1TBL, P1TBL; repeat from * to end. (This creates a twisted rib foundation row.)
Round 2 (CC): *Slip 1 with yarn in front, yarn over, slip 1 purlwise; repeat from * to end. (This sets up the brioche stitch. You are creating yarnovers and slipping stitches.)
Round 3 (MC): *BRK, slip 1 with yarn in front, yarn over; repeat from * to end. (You are now knitting the slipped stitch together with its yarnover from the previous round.)
Round 4 (CC): *Slip 1 purlwise with yarn in front, yarn over, BRP; repeat from * to end. (Now you are purling the stitch together with its yarnover.)
Round 5 (MC): *BRK, slip 1 with yarn in front, yarn over; repeat from * to end.
Round 6 (CC): *Slip 1 purlwise with yarn in front, yarn over, BRP; repeat from * to end.
Round 7 (MC): *K1TBL, P1TBL; repeat from * to end. (This closes off the brioche section and prepares for the cable.)
Round 8 (MC): *C4F, C4B; repeat from * to end. (This is your first cable ridge! The C4F and C4B create a beautiful, twisting "alpine" trail.)
Round 9 (MC): *K1TBL, P1TBL; repeat from * to end.
Round 10 (CC): *Slip 1 with yarn in front, yarn over, slip 1 purlwise; repeat from * to end. (Starting the second brioche section.)
Round 11 (MC): *BRK, slip 1 with yarn in front, yarn over; repeat from * to end.
Round 12 (CC): *Slip 1 purlwise with yarn in front, yarn over, BRP; repeat from * to end.
Round 13 (MC): *BRK, slip 1 with yarn in front, yarn over; repeat from * to end.
Round 14 (CC): *Slip 1 purlwise with yarn in front, yarn over, BRP; repeat from * to end.
Round 15 (MC): *K1TBL, P1TBL; repeat from * to end.
Round 16 (MC): *C4B, C4F; repeat from * to end. (This is the mirrored cable ridge, creating a balanced, symmetrical pattern.)
Round 17 (MC): *K1TBL, P1TBL; repeat from * to end.
Repeat Rounds 2-17 two more times, or until the cowl measures approximately 10 inches from the cast-on edge. You will have a total of three full brioche/cable sections.
Finishing Touches: Binding Off & Blocking
You're almost there! The final steps will ensure your cowl has a polished, professional look.
- Ribbing: Work 4 rounds of 2x2 ribbing (knit 2, purl 2) in MC.
- Bind Off: Bind off loosely in pattern (knit the knits and purl the purls). A stretchy bind-off, like the "Jeny's Surprisingly Stretchy Bind-Off," is highly recommended to maintain the cowl's flexibility.
- Weave in Ends: Use your tapestry needle to carefully weave in all loose ends on the inside of the cowl.
- Blocking: This is a crucial step! Gently wet-block the cowl. Soak it in lukewarm water with a drop of wool wash, gently squeeze out excess water (do not wring), and lay it flat to dry. Blocking will open up the brioche stitches, making them plush and even, and will define the cables beautifully.
Once dry, your Aurora Ridge Cowl is ready to wear! Drape it over your shoulders, wrap it high around your neck, or double it up for extra warmth. You've created a stunning, heirloom-quality accessory that is as unique as the mountain landscape that inspired it. Happy knitting!