Aurora Boreal Mist Scarf Free Pattern – Knit a Shimmering Gradient Wrap
Aurora Boreal Mist Scarf Free Pattern – Knit a Shimmering Gradient Wrap
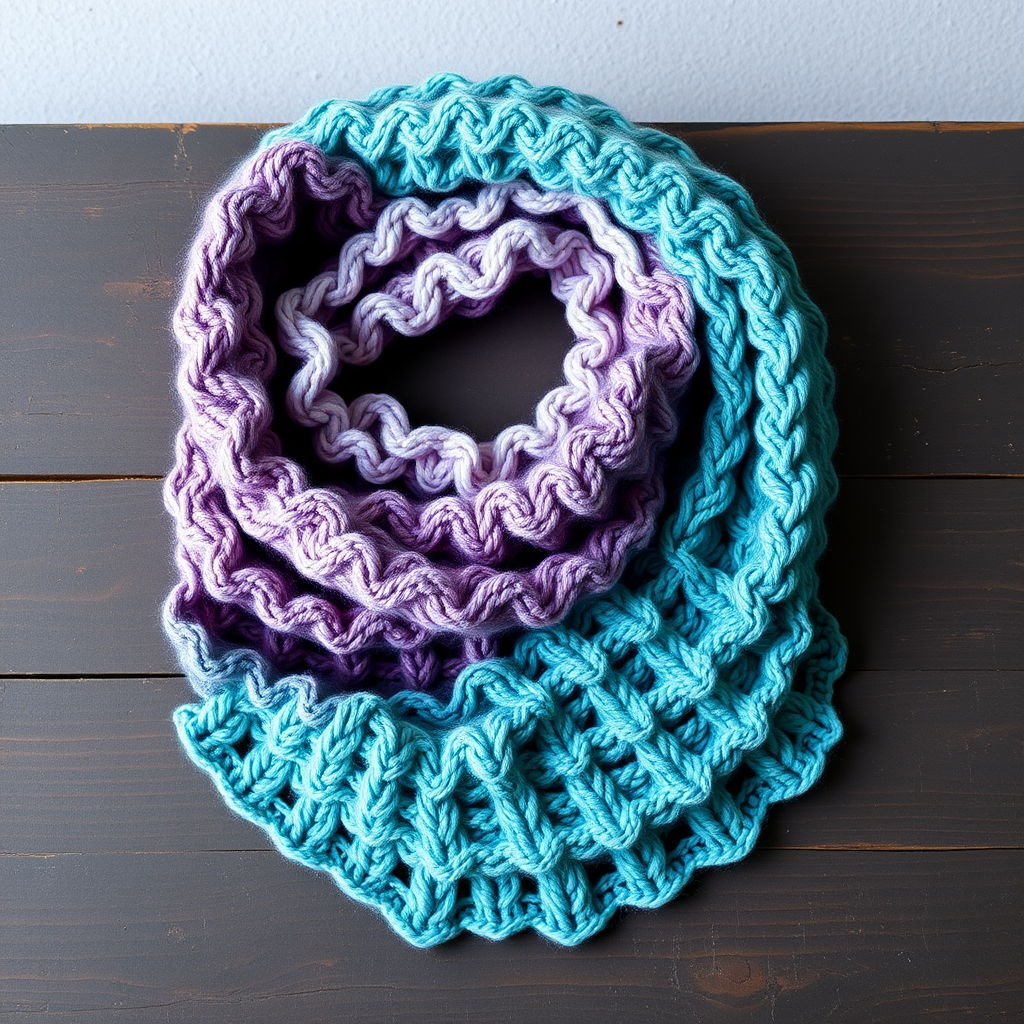
Wrap yourself in the ethereal beauty of the northern lights with this lightweight, gradient scarf that transitions from deep teal to soft lavender. The delicate lace ripple stitch mimics the dancing aurora, creating a dreamy, wearable piece of art. This free knitting pattern is perfect for intermediate beginners who want to explore lace work and color transitions while creating a stunning accessory that will turn heads wherever you go.
Whether you're looking for a thoughtful handmade gift or a special treat for yourself, the Aurora Boreal Mist Scarf delivers on every level. The fingering weight yarn creates a fabric that drapes beautifully, while the gradient color sequence adds visual interest without complicated colorwork techniques. Let's dive into this enchanting project!
Materials Needed
Before you begin your knitting journey, gather the following supplies:
Yarn
- Fingering weight yarn in 3 colors (approximately 400g total):
- Color A: Deep teal (approximately 100g)
- Color B: Mauve (approximately 150g)
- Color C: Soft lavender (approximately 150g)
Recommended yarn: Malabrigo Sock or any similar fingering weight yarn with good stitch definition. The yarn should be machine-washable or easy to care for, as this scarf will be worn frequently.
Needles
- US 6 (4.0 mm) knitting needles – or size needed to obtain gauge. Consider using circular needles (24" or longer) even though you'll work flat, as they're more comfortable for holding many stitches.
- Extra needle one size larger for bind off (optional but helpful)
Other Supplies
- Tapestry needle for weaving in ends
- Stitch markers (optional, to mark pattern repeats)
- Row counter or notebook for tracking pattern repeats
- Blocking mats and T-pins
- Wool wash or mild detergent
- Towel for blocking
Gauge
22 stitches and 30 rows = 4 inches in stockinette stitch (blocked)
Always knit a gauge swatch before starting your project. This ensures your finished scarf will match the intended measurements. If your gauge is off, adjust your needle size accordingly – smaller needles for more stitches per inch, larger needles for fewer.
Finished Measurements
Approximately 60 inches long and 14 inches wide (after blocking). The lace pattern will relax and open up beautifully during blocking, so don't be alarmed if your scarf looks narrower before blocking.
Abbreviations
- CO: cast on
- K: knit
- P: purl
- Yo: yarn over
- K2tog: knit two together (right-leaning decrease)
- SSK: slip, slip, knit (left-leaning decrease)
- Rep: repeat
- St(s): stitch(es)
- RS: right side
- WS: wrong side
Pattern Notes
- The scarf is worked flat in rows, with a simple lace pattern that is easy to memorize after a few repeats.
- Color changes are made at the end of a row; carry the unused yarn loosely up the side or weave in ends later. For a cleaner finish, I recommend weaving in ends as you go.
- Blocking is essential to open up the lace and enhance the gradient effect. Don't skip this step!
- The garter stitch border (first and last 2 stitches of every row) keeps the edges from curling and creates a polished finish.
- Work the lace pattern between the border stitches – the pattern repeat is designed to work perfectly with 70 stitches.
Step-by-Step Instructions
Cast On
CO 70 stitches with Color A (deep teal). Use a stretchy cast-on method like the long-tail cast-on or German twisted cast-on to ensure your edge has enough give. Take your time with this step – a neat cast-on edge sets the foundation for the entire project.
Border (Garter Stitch)
Rows 1-6: K all stitches.
This creates a 6-row garter stitch border at the beginning of your scarf. The garter stitch (knitting every row) creates a bumpy, textured edge that won't curl – perfect for the ends of your scarf.
Lace Ripple Pattern
Now we'll begin the beautiful lace ripple pattern. Each 10-row repeat creates one complete wave of the aurora pattern. The yarn overs (yo) create the increases, while the K2tog and SSK decreases balance them out, keeping your stitch count consistent.
Row 1 (RS): K2, *yo, K2tog, K4, SSK, yo, K1; rep from * to last 2 sts, K2.
Explanation: Knit 2 border stitches, then repeat the sequence between the asterisks across the row. Each repeat uses 9 stitches and creates 9 stitches, so your count stays at 70. End with K2 for the border.
Row 2 (WS): K2, P to last 2 sts, K2.
Explanation: Knit the 2 border stitches, purl across the middle section, then knit the last 2 border stitches. The purl row creates the wrong side of the lace.
Row 3: K2, *K1, yo, K2tog, K2, SSK, yo, K2; rep from * to last 2 sts, K2.
Explanation: Notice how the pattern shifts slightly – the yarn overs and decreases move one stitch to the right, creating the diagonal ripple effect. The stitch count remains balanced.
Row 4: K2, P to last 2 sts, K2.
Row 5: K2, *K2, yo, K2tog, SSK, yo, K3; rep from * to last 2 sts, K2.
Explanation: Here the K2tog and SSK are worked consecutively, creating a more pronounced decrease that shapes the wave. Don't worry if this feels a bit different – the pattern is designed to work seamlessly.
Row 6: K2, P to last 2 sts, K2.
Row 7: K2, *K3, yo, K2tog, K1, SSK, yo, K2; rep from * to last 2 sts, K2.
Explanation: The pattern continues its diagonal shift. Notice how the yarn overs are now separated by more knit stitches – this creates the gentle curve of the ripple.
Row 8: K2, P to last 2 sts, K2.
Row 9: K2, *K4, yo, K2tog, SSK, yo, K1; rep from * to last 2 sts, K2.
Explanation: The final pattern row of the repeat. The yarn overs are now near the end of the repeat, ready to start the cycle again on Row 1.
Row 10: K2, P to last 2 sts, K2.
Repeat Rows 1-10 for the lace pattern until you've completed your desired color sequence.
Color Sequence
Follow this color progression to achieve the beautiful aurora gradient effect:
- Color A (deep teal): Work 20 rows (2 full pattern repeats). This creates the deep, rich color at the ends of your scarf.
- Switch to Color B (mauve): Work 40 rows (4 full pattern repeats). The mauve creates a beautiful transition color that bridges the teal and lavender.
- Switch to Color C (soft lavender): Work 40 rows (4 full pattern repeats). This is the center color of your scarf – the palest, most ethereal shade.
- Switch back to Color B (mauve): Work 40 rows (4 full pattern repeats). Mirror the first mauve section.
- Switch to Color A (deep teal): Work 20 rows (2 full pattern repeats). Mirror the beginning of the scarf.
Pro tip: When changing colors, do so at the beginning of a right-side row for the cleanest transition. Leave a 6-inch tail when you cut the old color, and weave in ends later.
Border (Garter Stitch)
Rows 1-6: K all stitches.
This mirrors the border at the beginning of your scarf, creating a symmetrical, polished finish.
Bind Off
Bind off all stitches loosely. To ensure a stretchy bind-off that matches your cast-on edge, use a larger needle (one size up) or use the following method:
- Knit the first stitch.
- Knit the second stitch.
- Pass the first stitch over the second stitch and off the needle.
- Knit the next stitch, pass the previous stitch over, and continue.
This standard bind-off works well, but if you find it too tight, try the Jenny's Surprisingly Stretchy Bind-Off instead. The key is to keep your tension relaxed – you don't want a tight edge that pulls the scarf in.
Finishing
Now for the magical part – blocking! This step is crucial for lace patterns. Here's how to do it properly:
- Weave in all ends using a tapestry needle. Take your time and weave in at least 2 inches of yarn in each direction to ensure they don't come loose.
- Soak the scarf in lukewarm water with a drop of wool wash or mild detergent for 20 minutes. This allows the fibers to relax and open up.
- Gently squeeze out excess water – do not wring or twist the fabric, as this can felt the yarn and ruin your hard work.
- Lay flat on a towel and roll up to remove additional water. Press gently to absorb moisture.
- Pin to measurements: Place the scarf on blocking mats and gently stretch it to the finished measurements – approximately 60 inches long and 14 inches wide. Pay special attention to the width, as this is where the lace opens up. Use T-pins every few inches along the edges.
- Allow to dry completely – this may take 24-48 hours depending on humidity. Don't rush this step!
- Remove pins and enjoy your beautiful Aurora Boreal Mist Scarf!
Tips for Success
- Count your stitches after each pattern repeat, especially when you're first starting. The lace pattern should always return to 70 stitches at the end of Row 10.
- Use stitch markers to separate the border stitches from the pattern section, and optionally to mark each pattern repeat. This makes it easier to spot mistakes early.
- Keep a row counter or use a notebook to track which row you're on. The pattern is easy to memorize, but it's also easy to lose your place when you're in the rhythm of knitting.
- Don't be afraid to rip back if you make a mistake. Lace is forgiving, and it's better to fix errors early than to discover them after several more rows.
- Practice the lace pattern with a small swatch first if you're new to lace knitting. This will help you understand how the stitches work together before you commit to the full scarf.
Wearing and Caring for Your Scarf
This scarf is incredibly versatile – wear it wrapped loosely around your neck for a casual look, or drape it over your shoulders as a lightweight wrap for cooler evenings. The gradient colors mean it pairs beautifully with neutrals, denim, or even other jewel tones.
To care for your hand-knit treasure, hand wash in cold water with a gentle wool wash, and lay flat to dry. Avoid hanging, as the weight of the wet scarf can stretch it out of shape. With proper care, this scarf will last for years and become a beloved staple in your wardrobe.
The Aurora Boreal Mist Scarf is more than just an accessory – it's a wearable piece of art that captures the magic of the northern lights. As you knit, imagine the aurora dancing across the night sky, and let that inspiration flow through your needles. Happy knitting!