Whimsical Woolly Cactus Garden Free Pattern
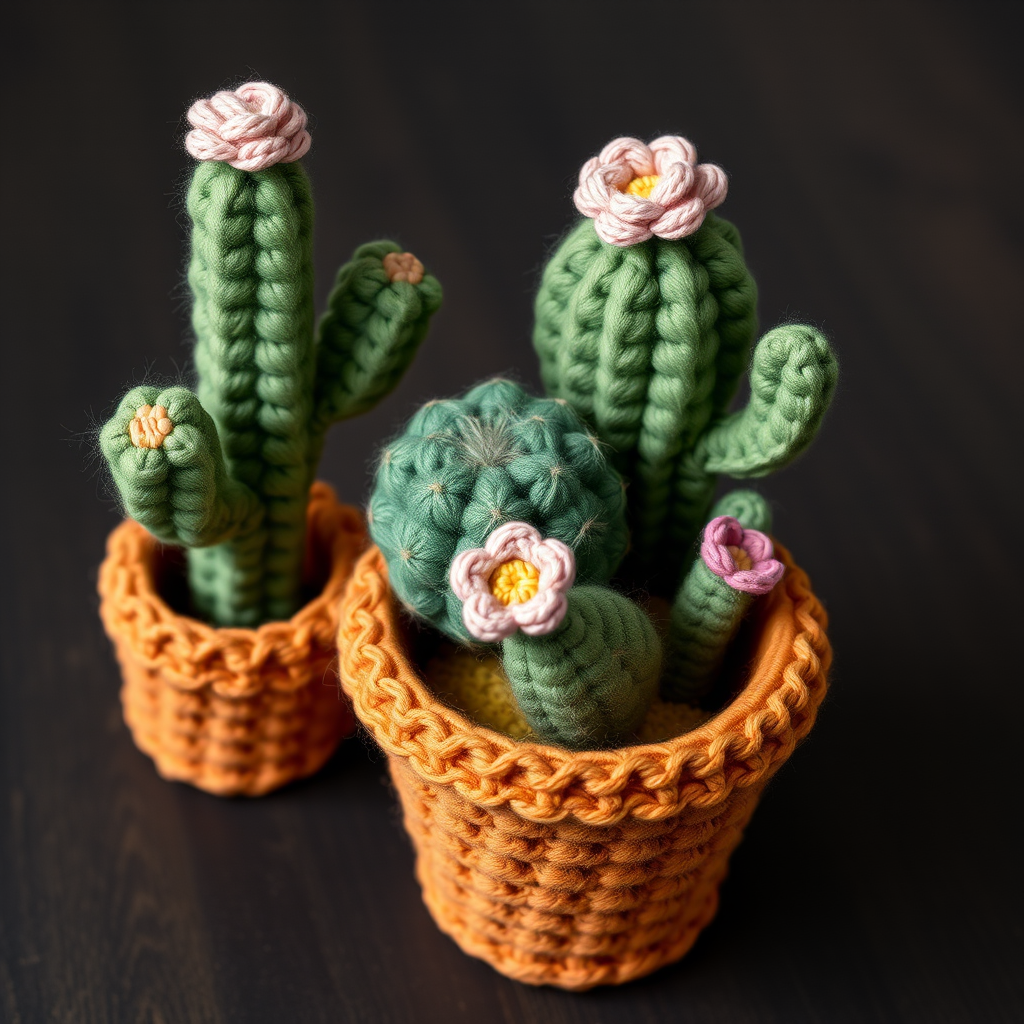
Bring the Desert Home: Your New Favorite Crochet Project
Are you ready to add a touch of whimsy to your living space without worrying about watering schedules or sunlight? Our Whimsical Woolly Cactus Garden is the perfect project for crafters of all levels, especially beginners looking for a fun, quick win. This adorable trio—a tall saguaro, a round barrel, and a small paddle—comes complete with tiny blooms and cozy pots, making it a delightful handmade gift that never needs watering. With just a few basic stitches and some soft cotton yarn, you'll create a charming desert scene that brings warmth and personality to any shelf, desk, or windowsill.
This pattern is designed to be approachable, using continuous spirals and simple increases and decreases. Whether you're new to amigurumi or a seasoned pro, the step-by-step instructions below will guide you through creating each cactus, flower, and pot with ease. Let's gather our supplies and get started on this joyful, rewarding craft!
Materials Needed
Before we dive into the stitches, let's make sure you have everything you need. This project uses basic materials that are easy to find at any craft store. Here's your shopping list:
- Yarn: Worsted weight cotton yarn in the following colors:
- Sage green (for the small paddle cactus)
- Forest green (for the round barrel cactus)
- Dusty pink (for the tall saguaro and one flower)
- Terracotta (for the pots)
- Small amount of yellow (for another flower)
- Crochet Hook: 3.75 mm (F-5) crochet hook
- Other Tools: Yarn needle for sewing, stitch markers (optional but helpful), and polyester fiberfill for stuffing.
Gauge: 4 sc x 4 rows = 1 inch. Gauge is not critical for this project, but maintaining consistent tension will help your cacti look neat and uniform.
Step-by-Step Instructions
This pattern creates three distinct cacti, each with its own unique shape. We'll work through them one by one, then finish with the flowers and pots. All pieces are worked in continuous spirals unless otherwise noted. Let's begin!
Cactus 1: Saguaro (Tall)
This majestic cactus is the star of the show, with its iconic arms and tall, slender body.
Body:
- Start with a magic ring and work 6 single crochets (sc) into it. Pull tight to close. (6 stitches)
- Round 2: Increase in each stitch around. (12 stitches)
- Round 3: (Sc 1, inc) around. (18 stitches)
- Rounds 4-10: Sc in each stitch around. (18 stitches)
- Round 11: (Sc 2, inc) around. (24 stitches)
- Rounds 12-20: Sc in each stitch around. (24 stitches)
- Round 21: (Sc 2, dec) around. (18 stitches)
- Rounds 22-28: Sc in each stitch around. (18 stitches)
- Round 29: (Sc 1, dec) around. (12 stitches)
- Stuff the body firmly with fiberfill, shaping it as you go.
- Round 30: Decrease around. (6 stitches)
- Fasten off, leaving a long tail. Weave the tail through the front loops of the remaining stitches and pull tight to close. Weave in the end.
Arms (make 2):
- Start with a magic ring and work 6 sc into it. Pull tight. (6 stitches)
- Rounds 2-8: Sc in each stitch around. (6 stitches)
- Stuff the arm lightly with fiberfill.
- Flatten the arm and sew it securely to the side of the body at round 15. Repeat for the second arm on the opposite side.
Cactus 2: Barrel (Round)
This plump, round cactus is a study in simple increases and decreases, creating a perfect sphere.
Body:
- Start with a magic ring and work 6 sc into it. Pull tight. (6 stitches)
- Round 2: Increase in each stitch around. (12 stitches)
- Round 3: (Sc 1, inc) around. (18 stitches)
- Round 4: (Sc 2, inc) around. (24 stitches)
- Round 5: (Sc 3, inc) around. (30 stitches)
- Rounds 6-15: Sc in each stitch around. (30 stitches)
- Round 16: (Sc 3, dec) around. (24 stitches)
- Round 17: (Sc 2, dec) around. (18 stitches)
- Stuff the body firmly with fiberfill.
- Round 18: (Sc 1, dec) around. (12 stitches)
- Round 19: Decrease around. (6 stitches)
- Fasten off, leaving a long tail. Weave the tail through the front loops of the remaining stitches and pull tight to close. Weave in the end.
Cactus 3: Paddle (Small)
This cute, flat cactus is the simplest of the three, perfect for practicing your shaping skills.
Body:
- Start with a magic ring and work 6 sc into it. Pull tight. (6 stitches)
- Round 2: Increase in each stitch around. (12 stitches)
- Round 3: (Sc 1, inc) around. (18 stitches)
- Rounds 4-8: Sc in each stitch around. (18 stitches)
- Round 9: (Sc 1, dec) around. (12 stitches)
- Stuff the body firmly with fiberfill.
- Round 10: Decrease around. (6 stitches)
- Fasten off, leaving a long tail. Weave the tail through the front loops of the remaining stitches and pull tight to close. Weave in the end.
Flowers (make 3)
These tiny blooms add a pop of color and charm to each cactus. You can mix and match the pink and yellow yarn as you like.
- With your chosen flower color (pink or yellow), start with a magic ring and work 5 sc into it. Pull tight. (5 stitches)
- Round 2: (Ch 3, sl st in next sc) around to form petals. You will have 5 petals total.
- Fasten off, leaving a long tail for sewing.
Pots (make 3)
Each cactus gets its own cozy terracotta pot, worked from the bottom up.
- With terracotta yarn, start with a magic ring and work 6 sc into it. Pull tight. (6 stitches)
- Round 2: Increase in each stitch around. (12 stitches)
- Round 3: (Sc 1, inc) around. (18 stitches)
- Round 4: (Sc 2, inc) around. (24 stitches)
- Rounds 5-7: Sc in each stitch around. (24 stitches)
- Round 8: Working in the back loops only, sc in each stitch around. (24 stitches) This creates a neat rim for the pot.
- Round 9: Sc in each stitch around. (24 stitches)
- Fasten off, leaving a long tail for sewing.
Assembly
Now for the fun part—bringing it all together!
- Sew the Cactus to the Pot: Position the cactus body inside the pot, with the bottom of the cactus resting on the inside base. Use the tail from the pot to sew the cactus securely to the inside of the pot, stitching through the back loops of the pot's round 8 and the bottom of the cactus.
- Attach the Flowers: Using the long tail from each flower, sew one flower to the top center of each cactus. Make sure it's securely attached.
- Add Spikes (Optional): For an extra touch of realism, use a contrasting green yarn and a yarn needle to create small surface slip stitches along the bodies of the cacti. This is a simple way to add texture and detail.
And there you have it—your very own whimsical woolly cactus garden! These little guys are perfect for brightening up a desk, gifting to a friend, or adding a handmade touch to your home decor. Enjoy your new, low-maintenance desert companions!


