Whimsical Woodland Gnome Trio Free Pattern – Crochet Garden Guardians
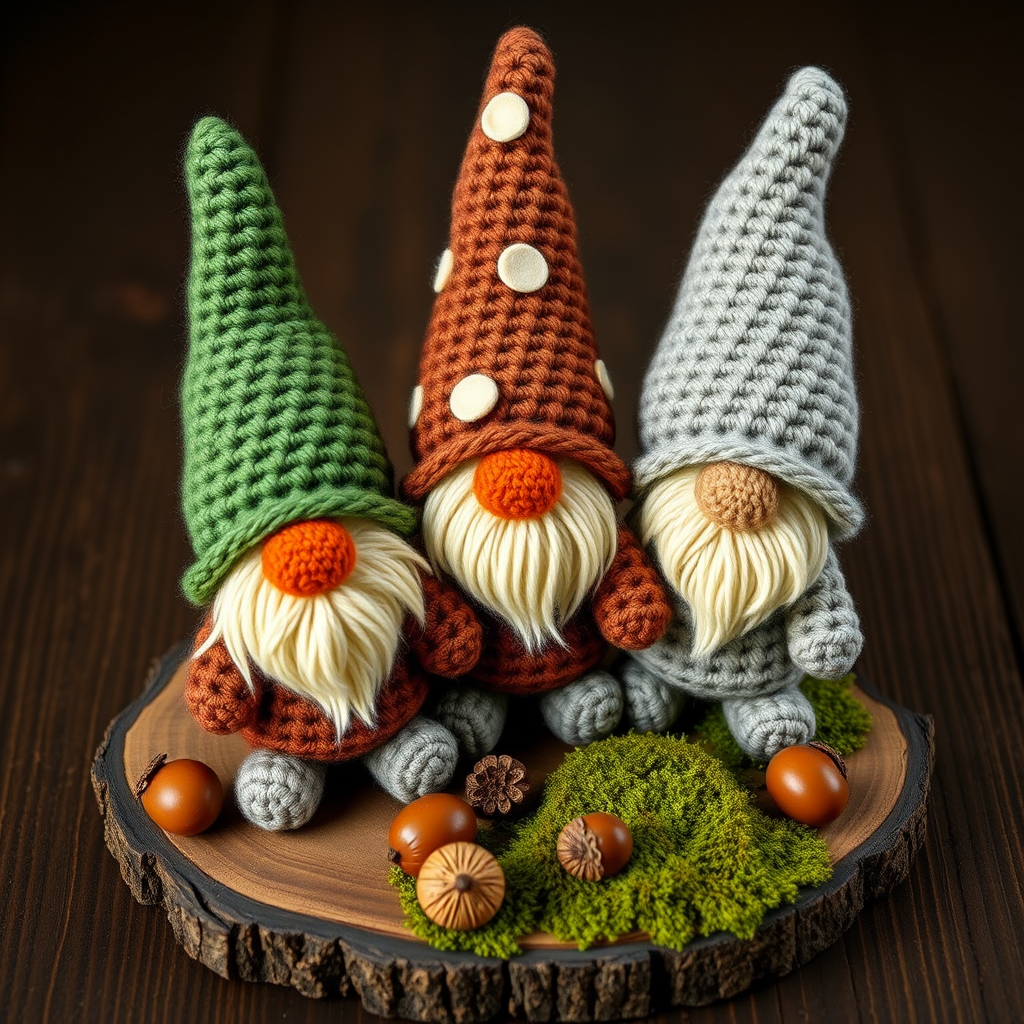
Whimsical Woodland Gnome Trio Free Pattern – Crochet Garden Guardians
Bring a touch of enchanted forest charm to your home with this adorable trio of crochet gnomes, each with a unique personality and cozy, earthy color palette. Perfect for beginners and seasoned crocheters alike, these little guardians make delightful gifts or whimsical shelf decor. With their fluffy cream beards, rust orange noses, and tall, curling hats, these gnomes will add a storybook feel to any room. Best of all, this free pattern is designed to be approachable, using simple single crochet stitches worked in continuous spirals.
Whether you're looking for a fun weekend project or a handmade gift that will be treasured, this gnome trio is sure to bring smiles. Let's gather your materials and get started on creating your very own woodland guardians!
Materials Needed
Before you begin, make sure you have the following supplies on hand. The yarn amounts listed are for all three gnomes combined.
- Yarn: Worsted weight cotton or acrylic yarn in earthy tones:
- Forest Green (for the forest gnome's body and hat)
- Mushroom Brown (for the mushroom gnome's body and hat)
- Soft Gray (for the stone gnome's body and hat)
- Cream (for the beards – you'll need enough for three)
- Rust Orange (for the noses – a small amount)
- Black (a tiny amount for embroidering the eyes)
- Hook: 3.5mm (E) crochet hook
- Other: Stitch marker, tapestry needle for sewing and weaving in ends, fiberfill stuffing, and scissors.
Gauge: Gauge is not critical for amigurumi, but aim for a tight tension to prevent the stuffing from showing through. A good guideline is approximately 5 single crochet stitches x 6 rows = 1 inch. If your stitches are too loose, try using a smaller hook.
Step-by-Step Instructions
This pattern creates three gnomes: a green-clad forest gnome, a brown-clad mushroom gnome, and a gray-clad stone gnome. Each gnome is worked in continuous spirals unless otherwise noted. Use a stitch marker to keep track of your rounds. The instructions below are for one gnome; repeat for each of the three colorways.
Common Body (Make 3, one in each main color: Forest Green, Mushroom Brown, Soft Gray)
The body forms the base of your gnome. Work it in your chosen main color.
- Round 1: Magic ring, 6 sc in ring. (6)
- Round 2: 2 sc in each st around. (12)
- Round 3: (Sc in next st, 2 sc in next st) repeat around. (18)
- Round 4: (Sc in next 2 sts, 2 sc in next st) repeat around. (24)
- Round 5: (Sc in next 3 sts, 2 sc in next st) repeat around. (30)
- Rounds 6-10: Sc in each st around. (30)
- Round 11: (Sc in next 3 sts, sc2tog) repeat around. (24)
- Round 12: (Sc in next 2 sts, sc2tog) repeat around. (18)
- Stuff firmly with fiberfill. Make sure the body is plump but not overstuffed, as you'll be attaching the head pieces next.
- Round 13: (Sc in next st, sc2tog) repeat around. (12)
- Round 14: Sc2tog around. (6)
- Fasten off, leaving a long tail. Thread the tail through a tapestry needle, weave it through the front loops of the remaining 6 stitches, pull tight to close the hole, and secure the yarn.
Beard (Make 3, in Cream)
The beard is a flat, fluffy circle that will be sewn onto the front of the body. Do not stuff it.
- Round 1: Magic ring, 6 sc in ring. (6)
- Round 2: 2 sc in each st around. (12)
- Round 3: (Sc in next st, 2 sc in next st) repeat around. (18)
- Round 4: (Sc in next 2 sts, 2 sc in next st) repeat around. (24)
- Rounds 5-6: Sc in each st around. (24)
- Fasten off, leaving a long tail for sewing. This will be the fluffy beard; it will protrude slightly when sewn onto the face.
Nose (Make 3, in Rust Orange)
A small, lightly stuffed sphere that gives the gnome his character.
- Round 1: Magic ring, 6 sc in ring. (6)
- Round 2: (Sc in next st, 2 sc in next st) repeat around. (9)
- Rounds 3-4: Sc in each st around. (9)
- Fasten off, leaving a long tail. Stuff lightly with a tiny amount of fiberfill and set aside.
Hat (Make 3, in coordinating colors: Forest Green, Mushroom Brown, Soft Gray)
The signature pointed hat. It's worked in increasing rounds to create a tall, slightly curved cone. The tip will naturally curl as you work.
- Round 1: Magic ring, 6 sc in ring. (6)
- Round 2: 2 sc in each st around. (12)
- Round 3: (Sc in next st, 2 sc in next st) repeat around. (18)
- Rounds 4-6: Sc in each st around. (18)
- Round 7: (Sc in next 2 sts, 2 sc in next st) repeat around. (24)
- Rounds 8-10: Sc in each st around. (24)
- Round 11: (Sc in next 3 sts, 2 sc in next st) repeat around. (30)
- Rounds 12-14: Sc in each st around. (30)
- Round 15: (Sc in next 4 sts, 2 sc in next st) repeat around. (36)
- Rounds 16-18: Sc in each st around. (36)
- Round 19: (Sc in next 5 sts, 2 sc in next st) repeat around. (42)
- Rounds 20-22: Sc in each st around. (42)
- Round 23: (Sc in next 6 sts, 2 sc in next st) repeat around. (48)
- Rounds 24-26: Sc in each st around. (48)
- Round 27: (Sc in next 7 sts, 2 sc in next st) repeat around. (54)
- Rounds 28-30: Sc in each st around. (54)
- Fasten off, leaving a long tail for sewing. The hat will naturally curl at the tip; you can gently fold it over for a whimsical look.
Assembly
Now it's time to bring your gnome to life! Follow these steps carefully for a polished finish.
- Attach the Beard: Position the beard on the front of the body, covering the lower half of the face. The beard should be centered and fluffy, protruding slightly. Using the long tail from the beard, sew it securely around the edge of the beard to the body. Weave in the end.
- Attach the Nose: Sew the nose onto the center of the beard, positioning it about 2 rounds above the bottom edge of the beard. Use the long tail from the nose to sew it securely, then weave in the end.
- Embroider the Eyes: Using the black yarn and a tapestry needle, embroider two small eyes just above the beard, on either side of the nose. Make small, tight stitches to create simple dots. Secure the yarn on the inside of the body.
- Attach the Hat: Place the hat on top of the head, slightly tilted for a playful look. The hat should cover the top of the head and extend upward, curling at the tip. Sew it securely around the base of the hat to the body using the long tail. Weave in the end.
- Repeat: Repeat the entire process for the other two gnomes, using their coordinating hat and body colors.
Optional Details
Add a little extra charm to your gnomes with these simple embellishments:
- For the mushroom gnome: Add small white spots to the brown hat using white yarn and a tapestry needle. Simply stitch small, random circles onto the hat before or after attaching it.
- For the stone gnome: Add a small crocheted leaf or flower to the hat for extra whimsy. You can make a simple leaf by chaining 5, then working 1 sc in the second chain from the hook, 1 hdc in the next, 1 dc in the next, 1 hdc in the next, and 1 sc in the last. Sew it to the side of the hat.
And there you have it—your very own trio of whimsical woodland gnomes! These little guardians are perfect for gifting, decorating a shelf, or adding a touch of handmade magic to your home. Enjoy your crochet adventure, and don't forget to share your creations with fellow crafters!


