The Whispering Willow Wall Art: A Free Crochet Pattern for a Textured, Modern Macrame-Inspired Tapestry
Introducing the Whispering Willow Wall Art
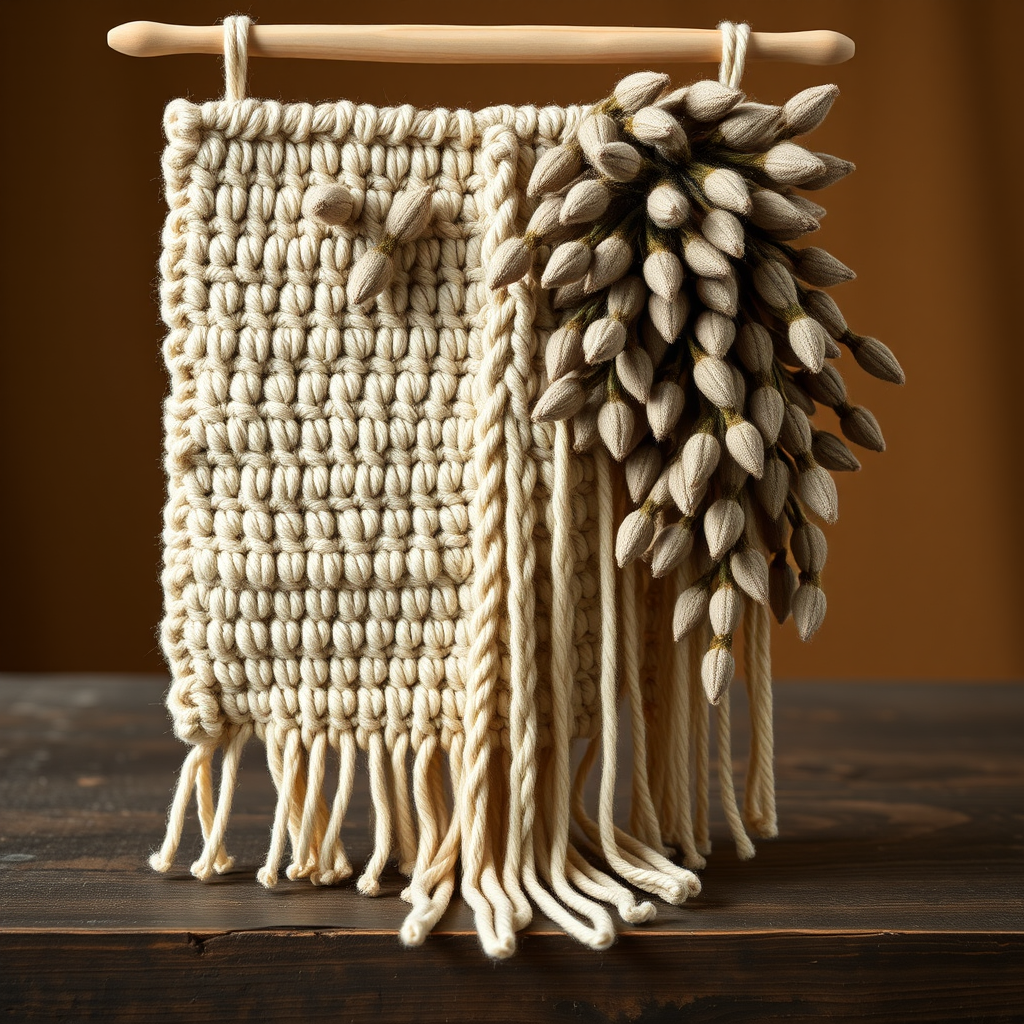
Transform your living space with a stunning, textured wall hanging that masterfully blends the art of crochet with the organic beauty of macrame. The Whispering Willow Wall Art features a cascading willow tree motif that creates a serene, modern focal point for any room. This free pattern is designed to be approachable for confident beginners while offering satisfying texture and visual depth for experienced crafters. The finished piece measures approximately 18 inches wide and 24 inches tall, making it a perfect statement piece for above a sofa, bed, or entryway console.
Materials Needed
Yarn Requirements
Lion Brand 24/7 Cotton (DK weight, 100% cotton) or any DK weight cotton/cotton-blend yarn:
- MC (Main Color - Ecru): 2 skeins (approximately 200 yards)
- CC1 (Contrast Color 1 - Linen): 1 skein (approximately 100 yards)
- CC2 (Contrast Color 2 - Sage): 1 skein (approximately 50 yards)
- CC3 (Contrast Color 3 - Mushroom): 1 skein (approximately 50 yards)
Tools & Notions
- Size G (4.0 mm) crochet hook
- Tapestry needle for weaving ends and sewing leaves
- Sharp scissors
- 18-inch wooden dowel or sturdy branch for hanging (approximately ½ inch to ¾ inch diameter)
- Stitch markers (optional, for counting rows)
Gauge
16 stitches and 8 rows of double crochet = 4 inches. Gauge is not critical for this project, but consistency is key for even texture. Work a 4x4 inch swatch to check your tension.
Step-by-Step Instructions
Important Notes Before Beginning
- The tapestry is worked from the bottom up, starting at the bottom edge.
- The main body is worked in rows, and the willow branches are added as separate pieces and sewn on.
- All stitches are in US terminology.
- Ch 3 at the beginning of each row counts as the first double crochet stitch.
- When changing colors, complete the last yarn over of the previous stitch with the new color.
Main Body (Bottom Section) - Rows 1-20
Foundation Chain: With MC (Ecru), chain 41 loosely.
Row 1: Double crochet in the 4th chain from the hook (the skipped 3 chains count as your first double crochet). Double crochet in each remaining chain across. You should have 39 double crochet stitches total (including the initial chain-3).
Row 2: Chain 3 (counts as first double crochet), turn your work. Double crochet in the next 38 double crochet stitches. (39 double crochet total)
Row 3 (Texture Row): Chain 3, turn. *Double crochet in the next 3 stitches, chain 1, skip the next stitch.* Repeat from * to * across the row. End with double crochet in the last 3 stitches. You will have 30 double crochet stitches and 9 chain-1 spaces.
Row 4: Chain 3, turn. Double crochet in the next 2 double crochet stitches. *Double crochet in the chain-1 space, then double crochet in the next 3 double crochet stitches.* Repeat from * to * across the row. You will have 39 double crochet stitches.
Rows 5-20: Repeat Rows 2, 3, and 4 in sequence five more times. This means you will work:
- Row 5: Repeat Row 2 (solid row)
- Row 6: Repeat Row 3 (texture row)
- Row 7: Repeat Row 4 (solid row)
- Continue this pattern until you have completed Row 20.
Willow Trunk (Center Section) - Rows 21-32
Row 21: With MC, chain 3, turn. Double crochet in the next 38 double crochet stitches. (39 double crochet)
Row 22 (Color Change Row): Chain 3, turn. Double crochet in the next 10 stitches. Change to CC1 (Linen) by completing the last yarn over of the 10th double crochet with CC1. Double crochet in the next 18 stitches with CC1. Change back to MC by completing the last yarn over of the 18th CC1 double crochet with MC. Double crochet in the last 10 stitches with MC. (39 double crochet total: 10 MC, 18 CC1, 10 MC)
Row 23: Chain 3, turn. Double crochet in the next 9 stitches with MC. Change to CC1. Double crochet in the next 20 stitches with CC1. Change to MC. Double crochet in the last 9 stitches with MC. (39 double crochet: 9 MC, 20 CC1, 9 MC)
Row 24: Chain 3, turn. Double crochet in the next 8 stitches with MC. Change to CC1. Double crochet in the next 22 stitches with CC1. Change to MC. Double crochet in the last 8 stitches with MC. (39 double crochet: 8 MC, 22 CC1, 8 MC)
Row 25: Chain 3, turn. Double crochet in the next 7 stitches with MC. Change to CC1. Double crochet in the next 24 stitches with CC1. Change to MC. Double crochet in the last 7 stitches with MC. (39 double crochet: 7 MC, 24 CC1, 7 MC)
Row 26: Chain 3, turn. Double crochet in the next 6 stitches with MC. Change to CC1. Double crochet in the next 26 stitches with CC1. Change to MC. Double crochet in the last 6 stitches with MC. (39 double crochet: 6 MC, 26 CC1, 6 MC)
Row 27: Chain 3, turn. Double crochet in the next 5 stitches with MC. Change to CC1. Double crochet in the next 28 stitches with CC1. Change to MC. Double crochet in the last 5 stitches with MC. (39 double crochet: 5 MC, 28 CC1, 5 MC)
Row 28: Chain 3, turn. Double crochet in the next 4 stitches with MC. Change to CC1. Double crochet in the next 30 stitches with CC1. Change to MC. Double crochet in the last 4 stitches with MC. (39 double crochet: 4 MC, 30 CC1, 4 MC)
Row 29: Chain 3, turn. Double crochet in the next 3 stitches with MC. Change to CC1. Double crochet in the next 32 stitches with CC1. Change to MC. Double crochet in the last 3 stitches with MC. (39 double crochet: 3 MC, 32 CC1, 3 MC)
Row 30: Chain 3, turn. Double crochet in the next 2 stitches with MC. Change to CC1. Double crochet in the next 34 stitches with CC1. Change to MC. Double crochet in the last 2 stitches with MC. (39 double crochet: 2 MC, 34 CC1, 2 MC)
Row 31: Chain 3, turn. Double crochet in the next 1 stitch with MC. Change to CC1. Double crochet in the next 36 stitches with CC1. Change to MC. Double crochet in the last 1 stitch with MC. (39 double crochet: 1 MC, 36 CC1, 1 MC)
Row 32: Chain 3, turn. Change to CC1 (do not use MC in this row). Double crochet in the next 38 stitches with CC1. (39 double crochet, all in CC1)
Willow Branches (Top Section) - Rows 33-40
Row 33: With CC1, chain 3, turn. Double crochet in the next 38 double crochet stitches. (39 double crochet)
Row 34 (Branch Opening Row): Chain 3, turn. *Double crochet in the next 3 stitches, chain 2, skip 2 stitches.* Repeat from * to * across the row. End with double crochet in the last 3 stitches. You will have 24 double crochet stitches and 6 chain-2 spaces (these will become the branch openings).
Row 35: Chain 3, turn. Double crochet in the next 2 double crochet stitches. *Double crochet in the chain-2 space (work 2 double crochet into the space to maintain stitch count), then double crochet in the next 3 double crochet stitches.* Repeat from * to * across the row. You will have 39 double crochet stitches.
Rows 36-40: Repeat Rows 34 and 35 two more times (Rows 36-37 and 38-39), then work Row 34 one final time (Row 40). After Row 40, fasten off CC1 and weave in the end.
Willow Leaves (Separate Pieces) - Make 12
Make 6 leaves in CC2 (Sage) and 6 leaves in CC3 (Mushroom).
Leaf Pattern:
- Chain 10.
- First side of leaf: Single crochet in the 2nd chain from the hook. Half double crochet in the next chain. Double crochet in the next 2 chains. Treble crochet in the next 2 chains. Double crochet in the next 2 chains. Half double crochet in the next chain. Single crochet in the last chain. (You have worked along one side of the foundation chain.)
- Turn the leaf: Chain 1, do not turn your work. Instead, rotate your work so you are now working along the opposite side of the foundation chain (the bottom loops of the chain).
- Second side of leaf: Single crochet in the first chain (the same chain where you made your last single crochet). Half double crochet in the next chain. Double crochet in the next 2 chains. Treble crochet in the next 2 chains. Double crochet in the next 2 chains. Half double crochet in the next chain. Single crochet in the last chain (the chain where you made your first single crochet).
- Fasten off, leaving a long tail (approximately 12 inches) for sewing the leaf onto the branches.
Assembly & Finishing
- Weave in all ends: Using your tapestry needle, carefully weave in all yarn tails from color changes and fastening off. Trim any excess yarn close to the work.
- Attach the leaves: Using the long tails left on each leaf, sew the leaves onto the branch openings (the chain-2 spaces) in a cascading pattern. Alternate colors CC2 and CC3 as you go. Place some leaves higher on the branches and some lower to mimic the natural drooping shape of a weeping willow. Sew each leaf securely by stitching through the base of the leaf and the chain-2 space, then knotting and weaving in the end.
- Mount on the dowel: Fold the top edge of the tapestry (the last row worked) over the wooden dowel. The dowel should sit approximately ½ inch below the top edge. Using a tapestry needle and a length of MC yarn, sew the folded edge down securely. Work from one side to the other, making sure the tapestry is centered on the dowel. Stitch through both layers of the folded edge, catching the back loops of the top row to create an invisible seam.
- Add a hanging cord (optional): Cut two 24-inch lengths of MC yarn. Fold each in half and tie a knot at the folded end. Attach one to each end of the dowel by looping the folded end around the dowel and pulling the loose ends through the loop. Tie the two loose ends together at the top to create a hanging loop. Alternatively, you can use the dowel as is and rest it on two hooks.
- Final shaping: Gently tug on the leaves and the bottom edge of the tapestry to encourage the natural drape. The leaves should cascade downward gracefully. Trim any remaining yarn tails.
Your Whispering Willow Wall Art is now complete! Hang it in a spot where it can catch natural light, which will highlight the beautiful texture of the cotton yarn and the gentle movement of the leaves. This piece brings a touch of nature indoors and adds a serene, modern boho vibe to any room.