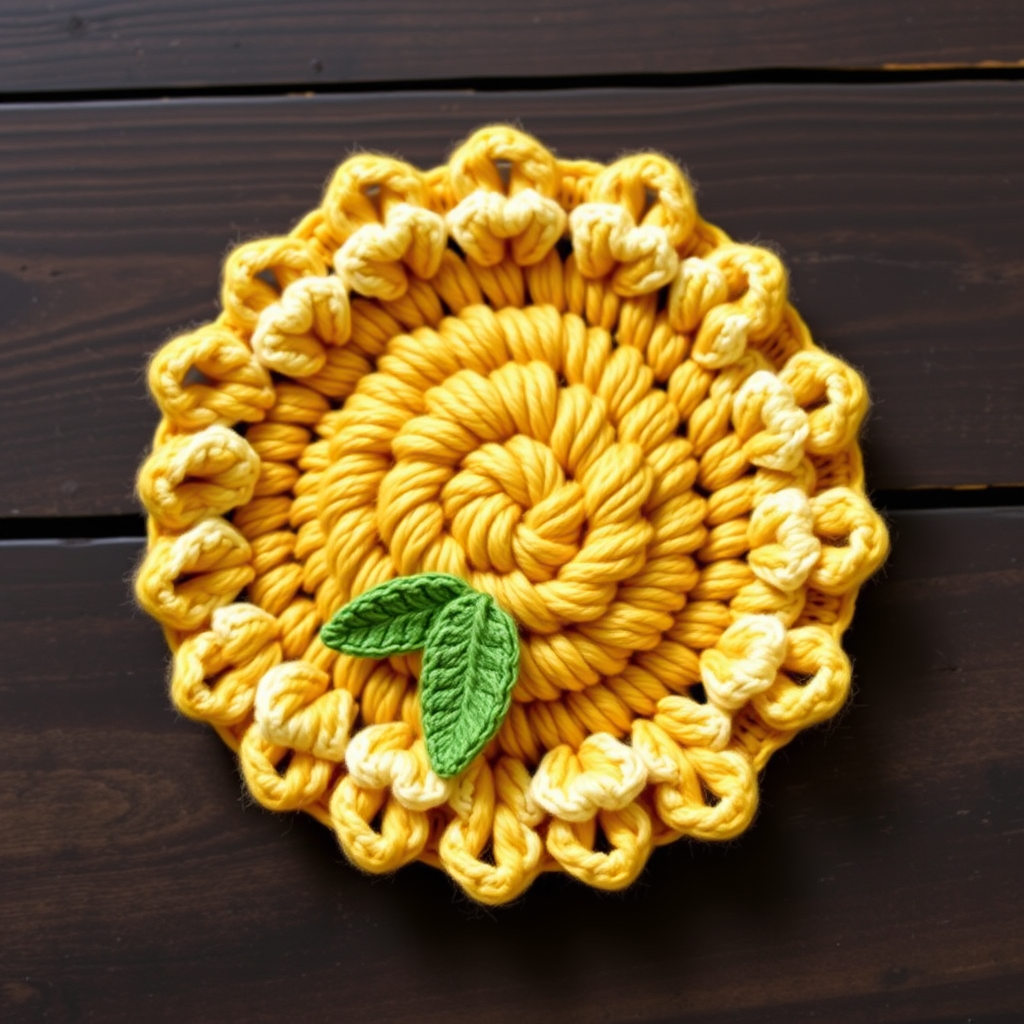
Solar Flare Sunburst Wall Hanging Free Pattern – Crochet a Radiant Boho Tapestry

Solar Flare Sunburst Wall Hanging Free Pattern – Crochet a Radiant Boho Tapestry
Bring the warmth of a golden sunset into your home with this stunning sunburst wall hanging, crafted entirely in rich, earthy tones. This beginner-friendly crochet project uses simple stitches and a single skein of chunky yarn to create a textured, bohemian statement piece. Whether you're looking to add a rustic touch to your living room or searching for a handmade gift, this pattern delivers a gorgeous, handcrafted result that looks like it came straight from a boutique.
This project is worked in continuous rounds from the center outward, then finished with a soft cream fringe. The combination of dense single crochet in the center, open lacy double crochet rays, and a solid border creates a beautiful play of textures that mimics the look of macramé without the complicated knots. All stitches are standard US crochet terms, making it accessible even if you're new to crochet.
Materials Needed
Before you begin, gather the following supplies. This project is designed to be economical—you'll use approximately 100g of each color, so one skein of each is perfect.
Yarn
- Lion Brand Wool-Ease Thick & Quick (or any super bulky weight yarn, category 6) in 4 colors:
- Color A (Saffron): Golden yellow for the center – approximately 100g
- Color B (Terracotta): Warm clay for the sunburst rays – approximately 100g
- Color C (Burnt Orange): Deep orange for the outer border – approximately 100g
- Color D (Cream): Soft off-white for the fringe – approximately 100g
Hook and Notions
- US Size N/P (10mm) crochet hook – this large hook is essential for achieving the chunky, open texture
- Tapestry needle for weaving in ends and attaching the fringe
- Scissors
- Optional: Blocking pins and a spray bottle for finishing
Gauge
4 rounds of the center circle = 4 inches in diameter. Gauge is not critical for this project, but keeping consistent tension throughout will ensure your circle lies flat and your rays are even.
Step-by-Step Instructions
This wall hanging is worked in continuous rounds from the center outward, then finished with a fringe. Follow each step carefully, and don't hesitate to count your stitches at the end of each round to ensure accuracy. The entire project takes approximately 3-4 hours for a beginner.
Center Circle (with Color A – Saffron)
This dense center forms the "sun" of your tapestry. Work these rounds in a spiral without joining, using a stitch marker to keep track of your rounds if needed.
- Round 1: Make a magic ring. Work 6 single crochet (sc) into the ring. Pull the tail tight to close the circle completely. (6 sts)
- Round 2: Work 2 sc in each stitch around. This doubles your stitch count. (12 sts)
- Round 3: *Sc in the next stitch, 2 sc in the next stitch* repeat from * to * around. This creates the increase pattern. (18 sts)
- Round 4: *Sc in the next 2 stitches, 2 sc in the next stitch* repeat around. (24 sts)
- Round 5: *Sc in the next 3 stitches, 2 sc in the next stitch* repeat around. (30 sts)
- Round 6: *Sc in the next 4 stitches, 2 sc in the next stitch* repeat around. (36 sts)
- Round 7: *Sc in the next 5 stitches, 2 sc in the next stitch* repeat around. (42 sts)
- Round 8: *Sc in the next 6 stitches, 2 sc in the next stitch* repeat around. (48 sts)
- Round 9: *Sc in the next 7 stitches, 2 sc in the next stitch* repeat around. (54 sts)
- Round 10: *Sc in the next 8 stitches, 2 sc in the next stitch* repeat around. (60 sts)
Fasten off Color A and weave in the end securely with your tapestry needle. Your circle should measure approximately 10 inches in diameter and lie perfectly flat. If it's ruffling, your tension is too loose; if it's cupping, your tension is too tight.
Sunburst Rays (with Color B – Terracotta)
This section creates the beautiful scalloped rays that radiate outward. You'll be working in joined rounds now, which creates the distinct "petal" effect.
- Round 11: Attach Color B with a slip stitch to any stitch of Round 10. Chain 3 (this counts as your first double crochet, dc). Work 1 dc in the same stitch. *Skip 2 stitches, work 2 dc in the next stitch* repeat from * to * around. Join with a slip stitch to the top of the beginning chain-3. (20 groups of 2 dc)
- Round 12: Chain 3. Work 1 dc in the space between the two dc of the previous round (this is the gap between the paired stitches). *Chain 1, work 2 dc in the next space between the dc groups* repeat around, ending with chain 1. Join with a slip stitch to the top of the beginning chain-3. (20 groups of 2 dc, with chain-1 spaces between)
- Round 13: Chain 3. Work 1 dc in the same space (the chain-1 space from the previous round). *Chain 2, work 2 dc in the next chain-1 space* repeat around, ending with chain 2. Join with a slip stitch. (20 groups of 2 dc, with chain-2 spaces between)
- Round 14: Chain 3. Work 1 dc in the same space (the chain-2 space). *Chain 3, work 2 dc in the next chain-2 space* repeat around, ending with chain 3. Join with a slip stitch. (20 groups of 2 dc, with chain-3 spaces between)
- Round 15: Chain 3. Work 1 dc in the same space (the chain-3 space). *Chain 4, work 2 dc in the next chain-3 space* repeat around, ending with chain 4. Join with a slip stitch. (20 groups of 2 dc, with chain-4 spaces between)
Fasten off Color B and weave in the end. You'll now see the beautiful sunburst effect taking shape, with the chain spaces creating open, lacy rays.
Outer Border (with Color C – Burnt Orange)
This solid border grounds the piece and gives it structure. The increases in Round 17 ensure the border lies flat and doesn't ruffle.
- Round 16: Attach Color C with a slip stitch to any chain-4 space. Chain 3. Work 2 dc in the same space. *Skip to the next chain-4 space, work 3 dc in that space* repeat from * to * around. Join with a slip stitch to the top of the beginning chain-3. (20 groups of 3 dc)
- Round 17: Chain 3. Work 1 dc in each of the next 2 stitches. *Work 2 dc in the space between the groups (the gap between the 3-dc clusters), work 1 dc in each of the next 3 stitches* repeat around, ending with 2 dc in the last space. Join with a slip stitch. (100 dc total)
- Round 18: Chain 1. Work 1 sc in each stitch around. Join with a slip stitch to the first sc. (100 sc)
Fasten off Color C and weave in the end. Your piece should now measure approximately 18-20 inches in diameter.
Fringe and Finishing (with Color D – Cream)
The fringe adds that perfect boho touch and frames the bottom of your tapestry beautifully.
- Cut the fringe: Cut 40 strands of Color D, each 12 inches long. You can wrap the yarn around a book or piece of cardboard to speed up this process.
- Attach the fringe: Fold each strand in half. Insert your hook from front to back through a stitch along the bottom edge of the hanging (the last round of Color C). Pull the folded loop through, then pull the ends through the loop and tighten gently. Repeat this fringe in every other stitch around the bottom edge. This will give you a full, lush fringe.
- Trim the fringe: Once all fringe is attached, trim the ends evenly to your desired length (about 4-5 inches). You can hold the piece up and use sharp scissors for a clean, straight line.
- Create a hanging loop: Cut a 10-inch strand of Color A (Saffron). Fold it in half and use a slip knot to attach it to the top center of the circle (between rounds 1 and 2). This creates a sturdy loop for hanging. Weave in all remaining ends with your tapestry needle.
- Optional blocking: To give your piece a professional finish, lightly mist it with water and pin it to shape on a flat surface. Let it dry completely before hanging. This helps the circle lie perfectly flat and the rays open up beautifully.
Tips for Success
- Use a stitch marker at the beginning of each round in the center circle to avoid losing your place.
- Keep your tension consistent throughout the project. The chunky yarn and large hook make this forgiving, but even tension ensures a professional look.
- Count your stitches at the end of each round, especially in the center circle, to ensure your increases are correct.
- Weave in ends as you go to avoid a pile of loose threads at the end.
- Hang with a wooden dowel or decorative branch for an even more rustic look, threading it through the top loop.
This Solar Flare Sunburst Wall Hanging is more than just a craft project—it's a piece of art that brings warmth and texture to any space. The rich autumnal colors of saffron, terracotta, burnt orange, and cream complement both modern and traditional interiors. Whether you hang it in your entryway, above your bed, or in a cozy reading nook, this handcrafted tapestry will be a conversation starter and a source of pride.
Happy crocheting, and enjoy your radiant new wall decor!