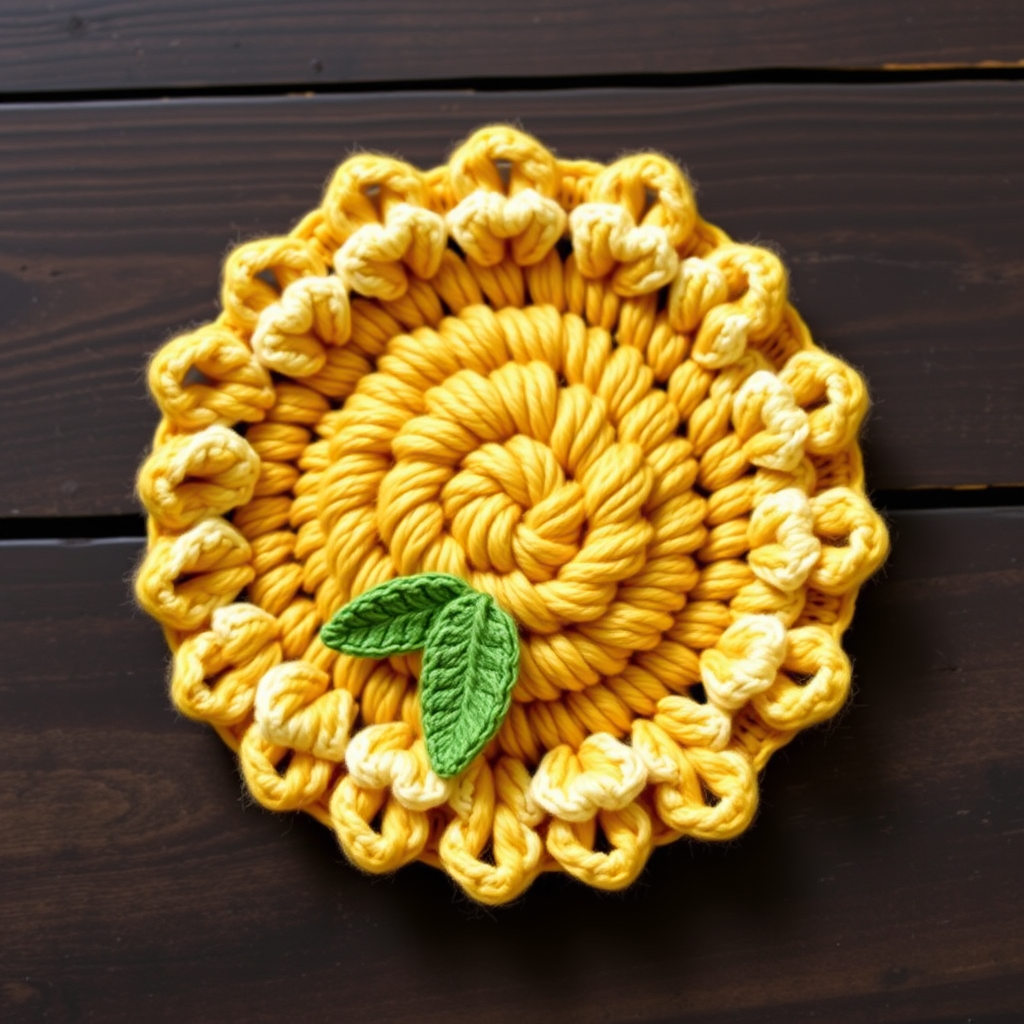
Harvest Hearth Pumpkin Coaster Free Pattern – A Crocheted Autumn Table Accent

Harvest Hearth Pumpkin Coaster Free Pattern – A Crocheted Autumn Table Accent
Bring the cozy warmth of autumn to your table with these textured pumpkin coasters, featuring a unique ribbed shell stitch and a charming cinnamon-stick stem. This quick project is perfect for using up scrap yarn and makes a delightful handmade gift. Whether you're hosting a fall gathering or simply want to add a seasonal touch to your daily coffee ritual, these charming coasters are the perfect small project to celebrate the harvest season.
What makes this pattern so special is its clever construction—worked in continuous spirals, the coaster naturally forms a rounded, slightly domed pumpkin shape with a flat bottom. The dense single crochet fabric creates a sturdy, absorbent surface that protects your tables from condensation while adding a pop of rustic charm. The optional surface slip stitch ribbing detail elevates the design, giving it that classic pumpkin ridge look that's so recognizable and beloved.
This project is rated beginner-friendly, making it an excellent choice for those new to crochet or for experienced makers looking for a quick, satisfying weekend project. Each coaster takes only about 30-45 minutes to complete, so you can easily whip up a full set of four or six for your autumn table setting.
Materials Needed
Before you begin, gather the following supplies to ensure a smooth crafting experience:
- Yarn: Worsted weight cotton yarn in three colors:
- Pumpkin orange (main body) – approximately 30-40 yards per coaster
- Burnt sienna (accent stripe) – approximately 5-8 yards per coaster
- Cinnamon brown (stem) – a small amount, approximately 2-3 yards
- Crochet Hook: US Size G/6 (4.0 mm) crochet hook
- Yarn needle: For weaving in ends and sewing the stem
- Scissors: For cutting yarn
- Stitch marker (optional): Helpful for tracking rounds, though the pattern uses continuous spirals
Gauge: 4 inches = 16 stitches and 12 rows in single crochet. While gauge isn't critical for this project, matching it will ensure your coaster is approximately 4 inches in diameter, perfect for standard mugs and glasses.
Yarn Substitution Tips: While cotton is recommended for its absorbency and durability, you can also use worsted weight acrylic or a cotton-blend yarn. Just ensure it's worsted weight (medium/4) to maintain the correct size and texture. If you want a chunkier coaster, try using a bulky weight yarn with a larger hook—just adjust your stitch count accordingly.
Step-by-Step Instructions
This coaster is worked in continuous spirals, so no joining at the end of rounds unless specified. This technique creates a seamless, smooth fabric that's perfect for the pumpkin's rounded shape. Let's get started!
Round 1: The Magic Ring Foundation
With pumpkin orange yarn, make a magic ring. If you're unfamiliar with the magic ring technique, here's a quick refresher: wrap the yarn around your fingers twice, insert your hook through the loop, yarn over and pull through, then chain 1 to secure. Work 6 single crochet (sc) into the ring. Pull the tail tight to close the ring completely, creating a small, neat circle. (6 stitches)
Pro Tip: If the magic ring feels tricky, you can alternatively chain 2 and work 6 sc into the second chain from the hook. Both methods work well—just ensure your starting circle is snug.
Round 2: Increasing for a Flat Circle
Work 2 sc in each stitch around. This means you'll be working two single crochets into every stitch from Round 1. (12 stitches)
As you work, you'll notice the circle beginning to flatten out. Keep your tension consistent—not too tight, not too loose—to maintain an even shape.
Round 3: Building the Circle
*Sc in next stitch, 2 sc in next stitch* repeat around. This creates an increase pattern that adds 6 stitches evenly. (18 stitches)
Understanding the Pattern: The asterisks (*) indicate a repeat. You'll work the sequence between the asterisks until you reach the end of the round. This is standard crochet notation.
Round 4: Continuing Increases
*Sc in next 2 stitches, 2 sc in next stitch* repeat around. (24 stitches)
Notice the pattern: each round adds one more single crochet before the increase. This mathematical progression ensures your circle stays flat and even.
Round 5: More Growth
*Sc in next 3 stitches, 2 sc in next stitch* repeat around. (30 stitches)
Your circle is growing nicely now, about 2.5 inches in diameter. The fabric should lie flat on your work surface without ruffling or cupping.
Round 6: Nearing the Halfway Point
*Sc in next 4 stitches, 2 sc in next stitch* repeat around. (36 stitches)
Round 7: Almost There
*Sc in next 5 stitches, 2 sc in next stitch* repeat around. (42 stitches)
Round 8: Final Increase Round
*Sc in next 6 stitches, 2 sc in next stitch* repeat around. (48 stitches)
At this point, your circle should measure approximately 4 inches in diameter. If it's slightly smaller or larger, don't worry—the final size will still work beautifully for most coasters.
Round 9: Working Even
Work even, sc in each stitch around. (48 stitches)
This means you'll simply single crochet in every stitch without any increases or decreases. This round begins to create the slight dome shape of the pumpkin.
Round 10: Adding the Burnt Sienna Stripe
Switch to burnt sienna yarn. Work even, sc in each stitch around. (48 stitches)
Color Change Technique: To switch colors seamlessly, work the last yarn over of the previous stitch with the new color. Pull the new yarn through the last two loops on your hook to complete the stitch. Leave a 4-6 inch tail of the old color to weave in later.
This burnt sienna stripe adds that beautiful autumnal gradient effect, reminiscent of a pumpkin that's ripening in the fall sun.
Round 11: Back to Pumpkin Orange
Switch back to pumpkin orange. Work even, sc in each stitch around. (48 stitches)
Use the same color change technique as before. Make sure to carry the pumpkin orange yarn loosely along the inside of your work if you plan to switch back and forth, or simply cut and rejoin as needed.
Round 12: Beginning the Decreases
*Sc in next 6 stitches, sc2tog (single crochet decrease)* repeat around. (42 stitches)
How to Work sc2tog: Insert your hook into the next stitch, yarn over and pull up a loop (2 loops on hook). Insert your hook into the following stitch, yarn over and pull up a loop (3 loops on hook). Yarn over and pull through all 3 loops on your hook. This decreases your stitch count by 1.
As you work this round, you'll notice the edges beginning to curl upward slightly—this is exactly what we want for the pumpkin's rounded shape.
Round 13: Continuing Decreases
*Sc in next 5 stitches, sc2tog* repeat around. (36 stitches)
The dome shape becomes more pronounced now. The coaster is starting to look like a small pumpkin bowl.
Round 14: Shaping Continues
*Sc in next 4 stitches, sc2tog* repeat around. (30 stitches)
Round 15: Getting Smaller
*Sc in next 3 stitches, sc2tog* repeat around. (24 stitches)
You'll notice the opening at the top is getting smaller. The fabric is becoming more three-dimensional, forming that perfect pumpkin dome.
Round 16: Nearly Closed
*Sc in next 2 stitches, sc2tog* repeat around. (18 stitches)
Round 17: Almost Done
*Sc in next stitch, sc2tog* repeat around. (12 stitches)
Round 18: Closing the Top
*Sc2tog* repeat around. (6 stitches)
You've now decreased down to just 6 stitches. The opening should be quite small at this point.
Finishing the Body
Fasten off, leaving a long tail (about 8-10 inches). Thread this tail through a yarn needle. Weave the tail through the front loops of the remaining 6 stitches, going through each loop from front to back. Pull tight to close the bottom completely. This creates a neat, gathered closure that hides the opening.
Weave in all ends using your yarn needle, being careful to hide them within the fabric so they're invisible from both sides. Trim any excess yarn.
Creating the Stem
With cinnamon brown yarn, chain 6. Work 1 sc in second chain from hook and in each chain across. This creates a small, flat strip that will become your stem. Fasten off, leaving a tail for sewing.
Stem Shaping Tip: For a more realistic look, you can work 2 sc in the first and last chains to create slightly wider ends, or simply keep it straight as written.
Sew the stem to the top center of the coaster, positioning it at the gathered closure point. Curl it slightly as you sew for a natural, organic look—like a real pumpkin stem that's dried and curled in the autumn sun. Use small, invisible stitches to secure it firmly.
Adding the Ribbing Detail (Optional)
For extra texture and that classic pumpkin ridge look, use a contrasting yarn (burnt sienna or a darker orange works beautifully) and work surface slip stitches vertically along the coaster to create pumpkin ridges.
How to Work Surface Slip Stitches: Insert your hook from front to back through the fabric at the bottom edge. Yarn over and pull up a loop. Insert your hook slightly above this point, yarn over, and pull through both loops on your hook. Continue this process, working upward in a straight line toward the top of the coaster.
Space them evenly around the coaster—typically 6-8 ridges looks best. This simple addition transforms your coaster from a simple circle into a clearly recognizable pumpkin.
Finishing Touches and Care Instructions
Once your coaster is complete, gently shape it with your hands, pressing the bottom flat and rounding the top. If using cotton yarn, you can lightly steam block it to set the shape—just hold a steam iron slightly above the surface without touching it directly.
Care Instructions: These coasters are machine washable in cold water on a gentle cycle. Lay flat to dry to maintain their shape. Avoid using fabric softener, which can reduce absorbency.
Make a set of four or six to protect your table during fall gatherings, or give them as thoughtful handmade gifts wrapped with a spiced cider mix or a pumpkin-scented candle. They also make wonderful stocking stuffers or hostess gifts for autumn dinner parties.
This pattern is endlessly customizable—try using different color combinations like cream and rust for a neutral palette, or deep burgundy and gold for a richer look. You could even add a small leaf shape or a loop for hanging as an ornament. The possibilities are as endless as your creativity!
Happy crocheting, and may your harvest hearth be warm and cozy this season!