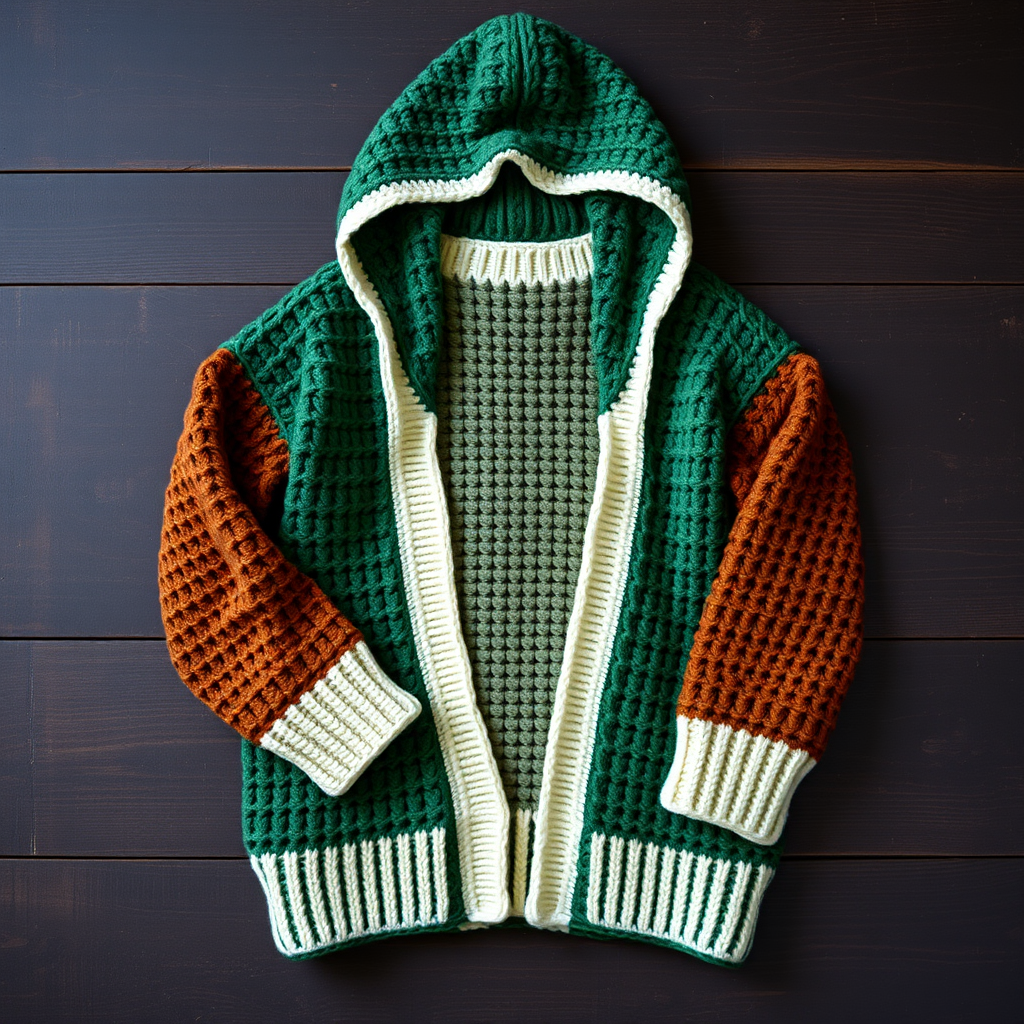
Harbor Mist Crochet Hooded Pullover Free Pattern: Ocean-Blue V-Stitch Hoodie with Mushroom Border

Harbor Mist Crochet Hooded Pullover: A Cozy Ocean-Blue Hoodie for Absolute Beginners
The Harbor Mist Hooded Pullover is the perfect first garment for anyone who has never picked up a crochet hook before. It is worked almost entirely from one simple, repeating stitch pattern, so you can build confidence with every round while watching a real, wearable hoodie grow in your hands. The finished piece is a relaxed, boxy men's pullover in soft recycled cotton, layered in deep navy-teal with a single soft aqua stripe across the chest and a triangle hood. Around each cuff, a tiny row of pale seafoam mushrooms adds a playful, kawaii touch. The fabric feels smooth and slightly ribbed, drapes softly, and is warm without being heavy — like a favorite sweatshirt you made yourself.
Materials Needed
- Yarn: Worsted weight (Category 4) recycled cotton, approx. 180 yd / 165 m per 100 g skein. Total for size M: approx. 1,150 yd / 1,050 m (about 6 skeins Deep Tide, 1 skein Sea Glass, 1 skein Foam).
- Yarn colors: Deep Tide (dark navy-teal) for body and hood; Sea Glass (soft aqua) for the contrast stripe and mushroom caps; Foam (pale seafoam white) for mushroom stems and cuff trim.
- Main hook: Size 5.5 mm (US I-9) crochet hook, or the size you need to match gauge.
- Border hook: Size 5.0 mm (US H-8) crochet hook for the mushroom border.
- Stitch markers (at least 6) to mark underarms, round beginnings, and the neckline.
- Tapestry needle (blunt-tipped, large eye) for seaming and weaving in ends.
- Scissors for cutting yarn.
- Tape measure for checking gauge and length.
- Finished sizes: Men's S (M, L, XL). Finished chest circumference: 40 (44, 48, 52) in / 102 (112, 122, 132) cm. Finished body length from underarm to hem: 16 (17, 18, 19) in / 41 (43, 46, 48) cm.
Abbreviations and Beginner Glossary
- ch – chain: wrap yarn over hook, pull it through the loop on your hook. This makes a small loop.
- sl st – slip stitch: insert hook into the stitch, yarn over, pull through the stitch AND through the loop on your hook at the same time. Makes an almost invisible join.
- sc – single crochet: insert hook into stitch, yarn over, pull up a loop (2 loops on hook), yarn over, pull through both loops. (1 loop remains.)
- dc – double crochet: yarn over, insert hook into stitch, yarn over, pull up a loop (3 loops on hook), yarn over, pull through 2 loops, yarn over, pull through last 2 loops.
- v-st – v-stitch: (dc, ch 1, dc) all worked into the same stitch or space. It looks like the letter V.
- beg – beginning.
- rep – repeat: do the same thing again.
- st(s) – stitch(es).
- sp – space: the little gap made by a chain.
- rnd – round: one complete circle of work.
- RS – right side: the outside of the finished garment that people see.
- WS – wrong side: the inside of the garment.
- turn – flip your work over so you can work back the other direction.
- fasten off – cut yarn, pull the tail through the last loop, and tighten.
Gauge
Gauge: In v-stitch pattern with the 5.5 mm hook, 4 v-stitch groups and 8 rows = 4 in / 10 cm square. Each v-stitch group is approx. 1 in / 2.5 cm wide.
Why gauge matters: Gauge is how big your stitches come out. If your stitches are bigger than the pattern expects, the hoodie will be too large; if smaller, it will be too tight. Checking first saves hours of work.
How to make a gauge swatch: With Deep Tide and the 5.5 mm hook, ch 20. Work v-stitch pattern back and forth for 10 rows. Lay it flat, measure 4 in / 10 cm across the middle, and count how many v-stitch groups fit. Then measure 4 in / 10 cm up and count rows. If you have more groups than 4, switch to a larger hook; if fewer, switch to a smaller hook. Try again until it matches.
Beginner Tips Before You Start
- Use stitch markers. Place one at the start of every round and one at each underarm. When you lose your place (you will at first!), the markers show you exactly where you are.
- Do not pull your yarn too tight. Keep an even, relaxed tension. Tight stitches make stiff fabric and make it hard to insert your hook.
- Count your v-stitch groups at the end of every round. The count is written in parentheses — check it before moving on.
- Join without twisting. When you join the first chain into a ring, make sure the chain lies flat and is not spiraled before you slip stitch.
- Try on as you go. The body is a simple tube — hold it against yourself to check the length before moving to the yoke.
- Keep your contrast stripe simple. Change color on the last pull-through of the stitch before the new round so the stripe edge looks clean.
Step-by-Step Instructions
Instructions are written for size M, with S, L, XL in parentheses. When only one number is given, it applies to all sizes.
V-Stitch Pattern (used throughout)
Rnd 1: Ch 3 (counts as first dc), dc in same st, [skip 1 st, (dc, ch 1, dc) in next st] rep to last st, skip 1 st, sl st to top of beg ch-3. Turn.
Rnd 2: Ch 3, dc in same st, [(dc, ch 1, dc) in each ch-1 sp] rep around, sl st to top of beg ch-3. Turn.
Repeat Rnd 2 for the pattern. Each v-stitch group sits in the ch-1 space of the group below.
Body (worked as one tube from hem to underarm)
With Deep Tide and the 5.5 mm hook, ch 80 (88, 96, 104). Join with sl st to first ch, being careful not to twist.
Rnd 1: Ch 3, dc in same ch, [skip 1 ch, (dc, ch 1, dc) in next ch] rep to last ch, skip 1 ch, sl st to top of beg ch-3. (40 (44, 48, 52) v-st groups)
Rnds 2–4: Work v-st pattern even in Deep Tide. (40 (44, 48, 52) v-st groups)
Rnd 5: Change to Sea Glass. Work 1 rnd v-st pattern. This is the single contrast stripe. (40 (44, 48, 52) v-st groups)
Rnd 6: Change back to Deep Tide. Work v-st pattern even. (40 (44, 48, 52) v-st groups)
Continue in Deep Tide, working v-st pattern even, until body measures 16 (17, 18, 19) in / 41 (43, 46, 48) cm from beginning, ending after a WS rnd. Fasten off, leaving a long tail for seaming. Do not turn.
Upper Body / Yoke (worked flat, back and forth from underarm to neck)
The tube is now divided: front and back panels are worked separately for the armhole openings, then joined at the shoulders. Place a marker at each underarm.
Row 1 (RS): With Deep Tide, join yarn at left underarm marker, ch 3, dc in same st, work v-st pattern across 20 (22, 24, 26) v-st groups (front panel), turn. Leave remaining groups unworked for the back panel. (20 (22, 24, 26) v-st groups)
Rows 2–8 (8, 9, 10): Work v-st pattern back and forth across front panel, keeping the same group count. (20 (22, 24, 26) v-st groups)
Shape neckline (front):
Row 9 (9, 10, 11): Work v-st pattern across 8 (9, 10, 11) groups, turn. Leave remaining groups unworked. (8 (9, 10, 11) v-st groups)
Row 10: Sl st across first group, work v-st pattern to end, turn. (7 (8, 9, 10) v-st groups)
Row 11: Repeat Row 10 once more. (6 (7, 8, 9) v-st groups) Fasten off.
Rejoin yarn at the other side of the front neckline and work the mirror-image shoulder the same way (Rows 9–11).
Back panel: With RS facing, join Deep Tide at right underarm, ch 3, dc in same st, work v-st pattern across remaining 20 (22, 24, 26) groups, turn. (20 (22, 24, 26) v-st groups)
Back Rows 2–10 (10, 11, 12): Work even in v-st pattern. (20 (22, 24, 26) v-st groups) Fasten off.
Join shoulders: With RS together, using the tapestry needle and Deep Tide, whipstitch or sl st the front and back shoulder edges together, matching group counts. Leave the neck opening free.
Sleeves (worked in the round from the armhole down)
With Deep Tide and the 5.5 mm hook, join yarn at underarm, ch 3, dc in same st, work v-st pattern evenly around the armhole opening, spacing groups so you have 16 (18, 20, 22) v-st groups. Join with sl st, turn. (16 (18, 20, 22) v-st groups)
Decrease rounds: Work v-st pattern in the round, decreasing 1 group every 6th rnd by working (dc, ch 1, dc) in every other ch-1 sp at the underarm seam, until 12 (13, 14, 15) groups remain and the sleeve measures 18 (19, 20, 21) in / 46 (48, 51, 53) cm from underarm. Fasten off. (12 (13, 14, 15) v-st groups)
Repeat for the second sleeve.
Hood (worked top-down from the neck, triangle shape)
With Deep Tide and the 5.5 mm hook, join yarn at center back neck.
Row 1 (RS): Ch 3, dc in same st, work v-st pattern evenly around the entire neck opening, working 1 v-st group in each shoulder seam and 1 group in each front neckline edge, ending with a sl st to beg ch-3. (approx. 24 (26, 28, 30) groups)
Row 2: Ch 3, dc in same st, work v-st pattern across to center front, turn. Do not join; the hood is worked back and forth. (24 (26, 28, 30) v-st groups)
Row 3: Ch 3, dc in same st, work v-st pattern to end, turn. (24 (26, 28, 30) v-st groups)
Rows 4–6: Work even in v-st pattern. (24 (26, 28, 30) v-st groups)
Shape the triangle point:
Row 7: Ch 3, dc in same st, work v-st pattern across to last 2 groups, turn (leave last 2 groups unworked). (22 (24, 26, 28) v-st groups)
Row 8: Sl st across first group, work v-st pattern to end, turn. (21 (23, 25, 27) v-st groups)
Repeat Rows 7–8 until 6 (6, 7, 7) groups remain.
Next row: Ch 3, dc in same st, work v-st pattern across, turn. (6 (6, 7, 7) v-st groups)
Next row: Ch 3, dc in same st, work v-st pattern across, turn. (6 (6, 7, 7) v-st groups) Fasten off, leaving a long tail.
Fold hood in half with RS together and whipstitch the center-back seam from the point up to the neck. Turn RS out.
Mushroom Border (worked as a single long strip, then joined in a loop around each cuff)
With Sea Glass and the 5.0 mm hook, ch 8.
Row 1: Sc in 2nd ch from hook and in each ch across. (7 sc) Turn.
Row 2: Ch 1, sc in each sc across. (7 sc) Turn.
Row 3 (mushroom cap): Ch 1, sc in first 2 sc, [dc, ch 1, dc] in next sc (mushroom cap), sc in next 2 sc, sc in last sc. (7 sts) Turn.
Row 4: Ch 1, sc in each sc and in ch-1 sp across. (7 sc) Turn.
Row 5: Change to Foam. Ch 1, sc in each sc across. (7 sc) Turn.
Row 6 (mushroom stem): Ch 1, sc in first 2 sc, sc in next 3 sc (stem), sc in last 2 sc. (7 sc) Turn.
Row 7: Change to Sea Glass. Ch 1, sc in each sc across. (7 sc) Turn.
Repeat Rows 3–7 until the strip measures the circumference of the cuff opening plus 1 in / 2.5 cm (approx. 14 (15, 16, 17) in / 36 (38, 41, 43) cm). Fasten off, leaving a long tail.
Join short ends with sl st or whipstitch to form a loop. Pin the loop around the cuff opening, RS facing out, and sew in place with the tapestry needle and matching yarn. Repeat for the second cuff.
Assembly and Finishing
Weave in ends: Thread each yarn tail onto the tapestry needle and run it through the back of several stitches (about 2 in / 5 cm), then trim close to the fabric. Never knot your ends — they can work loose.
Seam check: Turn the hoodie inside out and check that the shoulder seams and hood center-back seam are flat and even. Re-stitch any gaps with matching yarn.
Blocking: Lightly mist the finished hoodie with cool water, or soak it for 10 minutes and gently squeeze out the water (do not wring). Lay it flat on a towel, pat it to the finished measurements (chest 44 in / 112 cm for size M), and let it dry completely away from direct heat. This smooths the stitches and evens the v-stitch texture.
Final touch: Fold the hood back at the neckline for a relaxed look. Optional: work 1 rnd sc in Foam around the hem for a clean edge.
Pro Tips and Variations
- Change the colorway: Swap Deep Tide for charcoal and Sea Glass for mustard for a moodier hoodie, or use a single solid color and keep only the mushroom border in contrast.
- Adjust the size: To go up or down a size, add or remove v-stitch groups in multiples of 4 to the starting chain, and add or remove 1 in / 2.5 cm of body length. Keep the yoke and hood group counts in proportion.
- Substitute yarn: Any worsted weight (Category 4) yarn works — cotton blends drape like the sample, while acrylic is springier and easier to wash. Always re-check your gauge with a new yarn.
- Make the mushrooms pop: Work the mushroom border in a brighter contrast color, or add a second border strip around the hem for a matching detail.