Frosty's Cozy Cabin Companion Free Pattern
Frosty's Cozy Cabin Companion: A Free Crochet Snowman Amigurumi Pattern
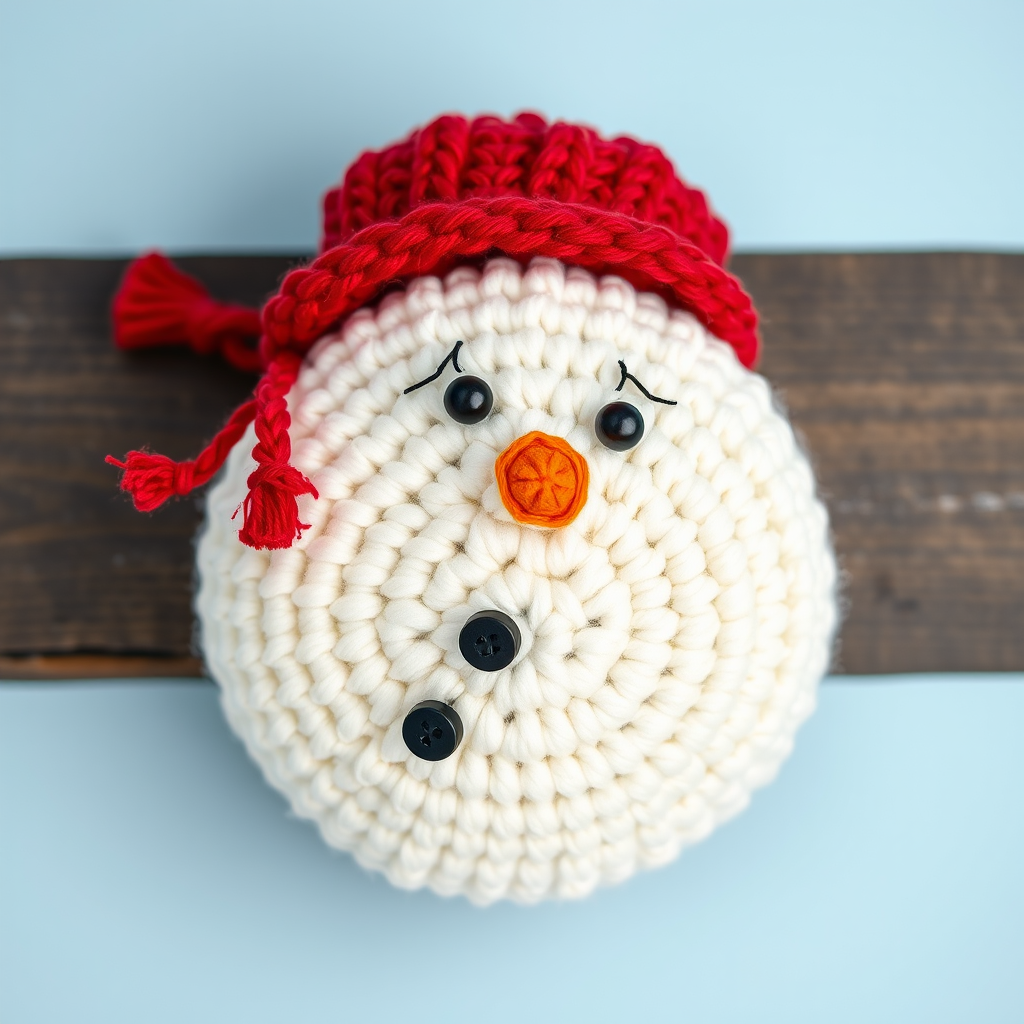
There's something undeniably magical about a handmade snowman—especially one that never melts! This charming, textured snowman amigurumi brings all the rustic warmth of a cozy cabin into your home. With his plump, huggable body, rustic red hat, and matching scarf, Frosty's Cozy Cabin Companion is the perfect winter crafting project. Whether you're a seasoned crocheter or a curious beginner, this free pattern uses simple single crochet stitches to create a soft, lovable winter friend that makes a wonderful gift or festive home décor piece. Let's grab our hooks and bring this little guy to life!
Materials Needed
Before we begin, let's gather all the supplies you'll need for this project. The beauty of this pattern is that it requires minimal materials and is perfect for using up scrap yarn from your stash.
- Yarn: Worsted weight yarn in the following colors:
- White (for the body and arms)
- Orange (for the carrot nose)
- Black (for the eyes, smile, and buttons)
- Rustic red or plaid-inspired color (for the hat and scarf)
- Crochet Hook: G/6 (4.0 mm) crochet hook
- Fiberfill: Polyester stuffing for a soft, huggable finish
- Yarn Needle: For embroidering the face and sewing pieces together
- Scissors: For cutting yarn
- Stitch Marker (optional): To help keep track of your rounds
Gauge: 4 inches = 16-20 stitches in single crochet. While gauge isn't critical for amigurumi, maintaining consistent tension will ensure your snowman comes out evenly shaped.
Step-by-Step Instructions
Head and Body (Worked in One Piece from Top Down)
This snowman is cleverly designed with the head and body worked as a single continuous piece, starting from the top of the head and working downward. This eliminates the need for sewing the head to the body and creates a smooth, seamless finish.
Round 1: With white yarn, make a magic ring. Work 6 single crochet (sc) into the ring. Pull the tail to close the ring tightly. (6 stitches)
Round 2: Work 2 sc in each stitch around. (12 stitches)
Round 3: *Sc in the next stitch, 2 sc in the next stitch* — repeat from * to * around. (18 stitches)
Round 4: *Sc in the next 2 stitches, 2 sc in the next stitch* — repeat from * to * around. (24 stitches)
Round 5: *Sc in the next 3 stitches, 2 sc in the next stitch* — repeat from * to * around. (30 stitches)
Round 6: *Sc in the next 4 stitches, 2 sc in the next stitch* — repeat from * to * around. (36 stitches)
Rounds 7-12: Sc in each stitch around. (36 stitches) — These six rounds create the smooth, rounded shape of the head without any increases.
Round 13 (Decrease Round): *Sc in the next 4 stitches, sc2tog (single crochet 2 together)* — repeat from * to * around. (30 stitches)
Round 14: *Sc in the next 3 stitches, sc2tog* — repeat from * to * around. (24 stitches)
Round 15: *Sc in the next 2 stitches, sc2tog* — repeat from * to * around. (18 stitches)
Round 16: *Sc in the next stitch, sc2tog* — repeat from * to * around. (12 stitches)
Round 17: Sc2tog around. (6 stitches)
Finishing the Body: Fasten off, leaving a long tail (approximately 12-15 inches) for closing. Important: Before closing the opening, stuff the snowman firmly with fiberfill. Shape the head and body with your hands as you stuff, ensuring the body is plump and round. Once stuffed to your desired firmness, thread the long tail onto your yarn needle. Weave the needle through the front loops of the remaining 6 stitches, going around the entire opening. Pull the tail gently to draw the opening closed, then weave the end securely into the body and trim.
Hat
Now let's create the rustic red hat that gives our snowman that cozy cabin vibe. The hat is worked from the top down, with a special folded brim detail.
Round 1: With rustic red yarn, make a magic ring. Work 6 sc into the ring. Pull tight to close. (6 stitches)
Round 2: 2 sc in each stitch around. (12 stitches)
Round 3: *Sc in the next stitch, 2 sc in the next stitch* — repeat from * to * around. (18 stitches)
Rounds 4-6: Sc in each stitch around. (18 stitches)
Round 7 (Brim Fold Line): Working in the back loops only, sc in each stitch around. (18 stitches) — This creates a distinct ridge that will allow the brim to fold up neatly.
Rounds 8-10: Sc in each stitch around. (18 stitches)
Finishing the Hat: Fasten off, leaving a long tail for sewing. Position the hat on top of the snowman's head. Sew it in place using the yarn needle, making sure to catch the bottom edge securely. Once attached, fold the brim up slightly along the ridge created in Round 7 to give the hat that charming, rustic look.
Scarf
The scarf is a simple rectangle that adds a pop of color and completes the cabin-inspired look.
Row 1: With rustic red yarn, chain 40. Sc in the second chain from the hook and in each chain across. (39 stitches)
Finishing the Scarf: Fasten off and weave in the ends. Wrap the scarf around the snowman's neck area, positioning it just below the head. You can either tie a small knot at the front or side, or sew it in place with a few discreet stitches to keep it secure.
Face
Now for the fun part—giving our snowman his charming personality! Using the yarn needle and black yarn, embroider two small eyes. Position them about 4-5 rounds down from the top of the head, spaced evenly apart. For the smile, embroider a gentle curve below the eyes using black yarn.
For the carrot nose, switch to orange yarn. Embroider a small triangle shape centered between and slightly below the eyes. To create a more dimensional nose, you can work a few straight stitches in a triangular formation, building up the shape slightly.
Buttons
Using black yarn, embroider three small buttons down the front center of the body. Space them evenly, starting just below the scarf and working down toward the bottom. Each button can be a simple cross-stitch or a few straight stitches in a small cluster.
Arms (Make Two)
These simple little arms are the final touch to complete your snowman.
Round 1: With white yarn, make a magic ring. Work 6 sc into the ring. Pull tight to close. (6 stitches)
Rounds 2-4: Sc in each stitch around. (6 stitches)
Finishing the Arms: Fasten off, leaving a long tail. Do not stuff the arms—they should remain flat and flexible. Sew the arms to the sides of the body, positioning them about halfway down the body, just below the scarf line. Weave in all ends securely.
Your Cozy Companion Awaits!
Congratulations! You've just created your very own Frosty's Cozy Cabin Companion. This delightful snowman is perfect for adding a touch of winter warmth to your home, gifting to a loved one, or displaying on a shelf, mantel, or windowsill. The simple stitches and clear construction make this an ideal project for beginners looking to expand their amigurumi skills, while the charming design will delight crafters of all levels.
Feel free to personalize your snowman—experiment with different scarf colors, add a tiny pine sprig, or give him rosy cheeks with a touch of pink yarn. However you choose to make him your own, this frosty friend is sure to bring smiles and cozy cabin vibes all winter long. Happy crocheting!


