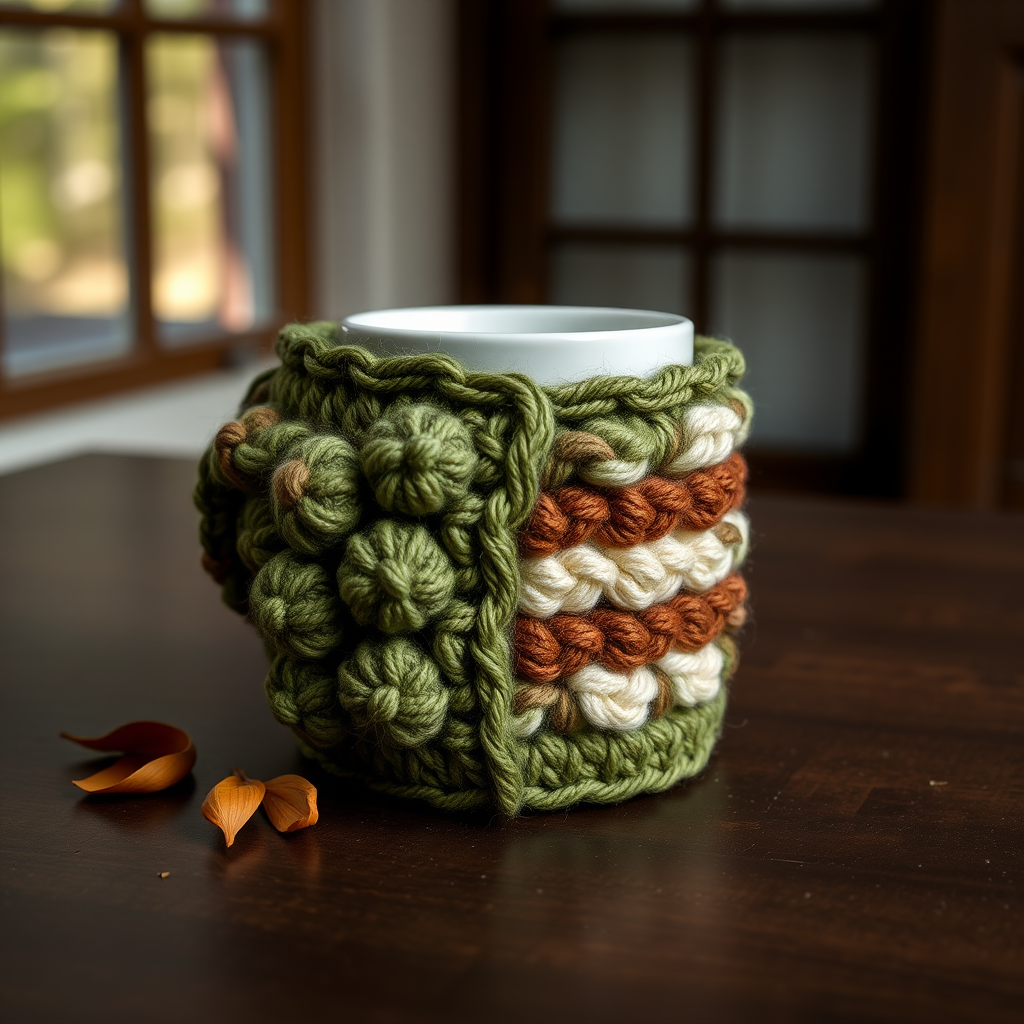
Ember & Ivy Crochet Coffee Cozy Free Pattern – A Textured Autumn Wrap

Ember & Ivy Crochet Coffee Cozy – Free Textured Autumn Wrap Pattern
There’s something magical about wrapping your hands around a warm mug on a crisp autumn morning. Now imagine that mug wrapped in a handcrafted cozy with rich, tactile texture and colors straight from a fall forest floor. The Ember & Ivy Crochet Coffee Cozy is a beginner-friendly project that delivers heirloom-quality results. With alternating cable and seed stitch bands, this cozy isn't just functional—it's a statement piece that turns your daily coffee ritual into a moment of handmade luxury.
Whether you're looking for a thoughtful handmade gift, a way to use up worsted-weight cotton scraps, or a quick weekend project, this free pattern is your perfect companion. Let's dive in and create something beautiful together.
Why You'll Love This Pattern
This cozy is worked flat in simple rows, then seamed at the back—no complicated shaping or circular knitting required. The stitch patterns look intricate but are surprisingly easy once you master two basic post stitches. Plus, the three-color palette (Burnt Orange, Deep Teal, and Cream) captures the essence of autumn in every stitch. It fits a standard 12 oz mug (approximately 9 inches around and 3.5 inches tall), and you can easily adjust the length by adding or subtracting rows.
Materials Needed
Before you begin, gather these supplies:
- Yarn: Worsted weight cotton or cotton-blend yarn in three colors:
- Color A: Burnt Orange (approx 20g)
- Color B: Deep Teal (approx 20g)
- Color C: Cream (approx 10g)
- Hook: 5.0 mm (H-8) crochet hook
- Extras: Yarn needle for weaving in ends, scissors
Gauge: 16 single crochet (sc) x 18 rows = 4 x 4 inches (10 x 10 cm). Gauge is important for a snug fit, so take a moment to check yours.
Special Stitches You'll Need
Don't worry if these are new to you—they're easier than they look! Practice a few on a swatch first if needed.
Front Post Double Crochet (fpdc)
Yarn over, insert your hook from front to back around the post of the stitch in the row below (not through the top loops), yarn over, pull up a loop, then complete as a regular double crochet (yarn over, pull through two loops, yarn over, pull through two loops).
Back Post Double Crochet (bpdc)
Yarn over, insert your hook from back to front around the post of the stitch in the row below, yarn over, pull up a loop, then complete as a regular double crochet.
Seed Stitch (worked in rows)
This creates a beautiful nubby texture. In the first row: *sc, dc* in the same stitch, skip the next stitch, repeat across. On the next row, work a sc into the dc of the previous row and a dc into the sc of the previous row. This alternation creates the seed-like bumps.
Step-by-Step Instructions
Follow these instructions carefully, and you'll have a beautiful cozy in no time. The pattern is worked flat in rows, then seamed at the back.
Foundation
With Color A (Burnt Orange), chain 22.
Row 1 (Foundation Row)
Single crochet (sc) in the 2nd chain from your hook and in each chain across. Turn. You should have 21 sc stitches.
Row 2
Chain 1, sc in each stitch across. Turn. (21 sc)
Row 3 (Cable Band Start)
Chain 2 (this counts as your first double crochet), then work the following pattern:
- fpdc in the next 3 stitches
- bpdc in the next 3 stitches
- fpdc in the next 3 stitches
- bpdc in the next 3 stitches
- fpdc in the next 3 stitches
- bpdc in the next 2 stitches
- dc in the last stitch
Turn. (21 stitches total)
Row 4
Chain 2, then work the opposite pattern:
- bpdc in the next 3 stitches
- fpdc in the next 3 stitches
- bpdc in the next 3 stitches
- fpdc in the next 3 stitches
- bpdc in the next 3 stitches
- fpdc in the next 2 stitches
- dc in the last stitch
Turn. (21 stitches)
Row 5
Repeat Row 3 exactly.
Row 6
Repeat Row 4 exactly.
Tip: These alternating front and back post stitches create the beautiful cable-like ribbed texture. The key is to always work into the post of the stitch directly below, not the top loops.
Row 7
Chain 1, sc in each stitch across. Turn. (21 sc)
Row 8 (Seed Stitch Band)
Chain 1, then work the seed stitch pattern:
- *sc, dc* in the first stitch
- Skip the next stitch
- Repeat from * across the row
- End with a sc in the last stitch
Turn. You should have 11 groups of seed stitches.
Row 9
Chain 1, then work the alternating seed stitch:
- *sc in the dc of the previous row, dc in the sc of the previous row*
- Repeat from * across
- End with a sc in the last stitch
Turn.
Row 10
Repeat Row 9 exactly.
Row 11
Chain 1, sc in each stitch across. Turn. (21 sc)
Row 12 (Color Change to B)
With Color B (Deep Teal), chain 1, sc in each stitch across. Turn.
Tip: When changing colors, leave a 6-inch tail to weave in later. Don't cut the old color until you're sure you won't need it again.
Rows 13–18 (Second Pattern Repeat)
Now you'll repeat the pattern bands using your new colors:
- Rows 13–16: Repeat Rows 3–6 using Color B for the cable band.
- Row 17: Chain 1, sc in each stitch across with Color B. Turn.
- Row 18: Switch to Color C (Cream) and work the seed stitch band (Rows 8–10 pattern) using Color C.
Note: The pattern calls for Color B for the cable band and Color C for the seed stitch band. Change colors as indicated at the start of each band.
Row 19
With Color C (Cream), chain 1, sc in each stitch across. Turn. (21 sc)
Row 20 (Final Row)
Chain 1, sc in each stitch across. Fasten off, leaving a long tail (at least 12 inches) for seaming.
Finishing Your Cozy
Now it's time to bring your cozy to life:
- Fold and seam: Fold the cozy in half with right sides together (the pretty textured side facing inward).
- Whip stitch: Using the long tail you left, whip stitch the short ends together. Insert your needle through the edge stitches, creating a neat seam.
- Turn right side out: Carefully turn the cozy right side out so the seam is on the inside.
- Weave in ends: Use your yarn needle to weave in all loose ends securely. Trim any excess.
Optional Button Closure
Want an adjustable fit or a different look? Instead of seaming, try this alternative:
- Sew a button onto one short end of the cozy.
- Create a chain-loop on the opposite end by chaining 6-8 stitches and securing it.
- Button the loop over the button to close. This allows you to adjust the fit for different mug sizes.
Customization Ideas
This pattern is wonderfully versatile. Here are a few ways to make it your own:
- Change the colors: Try muted sage, dusty rose, and oatmeal for a softer look, or bright jewel tones for a modern twist.
- Adjust the length: For a taller mug, add more rows to the cable or seed stitch bands. For a shorter mug, remove a few rows.
- Add a tag: Embroider a small leaf or initial on the cream band for a personal touch.
Care Instructions
To keep your cozy looking beautiful, hand wash in cool water with mild detergent. Lay flat to dry. Do not wring or tumble dry. Your cozy will last for years with proper care.
Final Thoughts
The Ember & Ivy Crochet Coffee Cozy is more than just a mug accessory—it's a little piece of autumn you can hold in your hands. The combination of cable ribs and seed stitch bumps creates a sensory experience that elevates your daily coffee break. And because it's worked flat with simple stitches, it's perfect for beginners who want to try something new without feeling overwhelmed.
Whether you're making one for yourself or as a heartfelt gift, this cozy is sure to bring warmth and joy. So grab your hook, choose your autumn colors, and let's create something beautiful together. Happy crocheting!
Share your finished cozy with us! Tag your photos with #EmberAndIvyCozy and inspire others to wrap their mugs in handmade warmth.