Chunky Cable Knit Yoke Sweater Pattern
Introduction
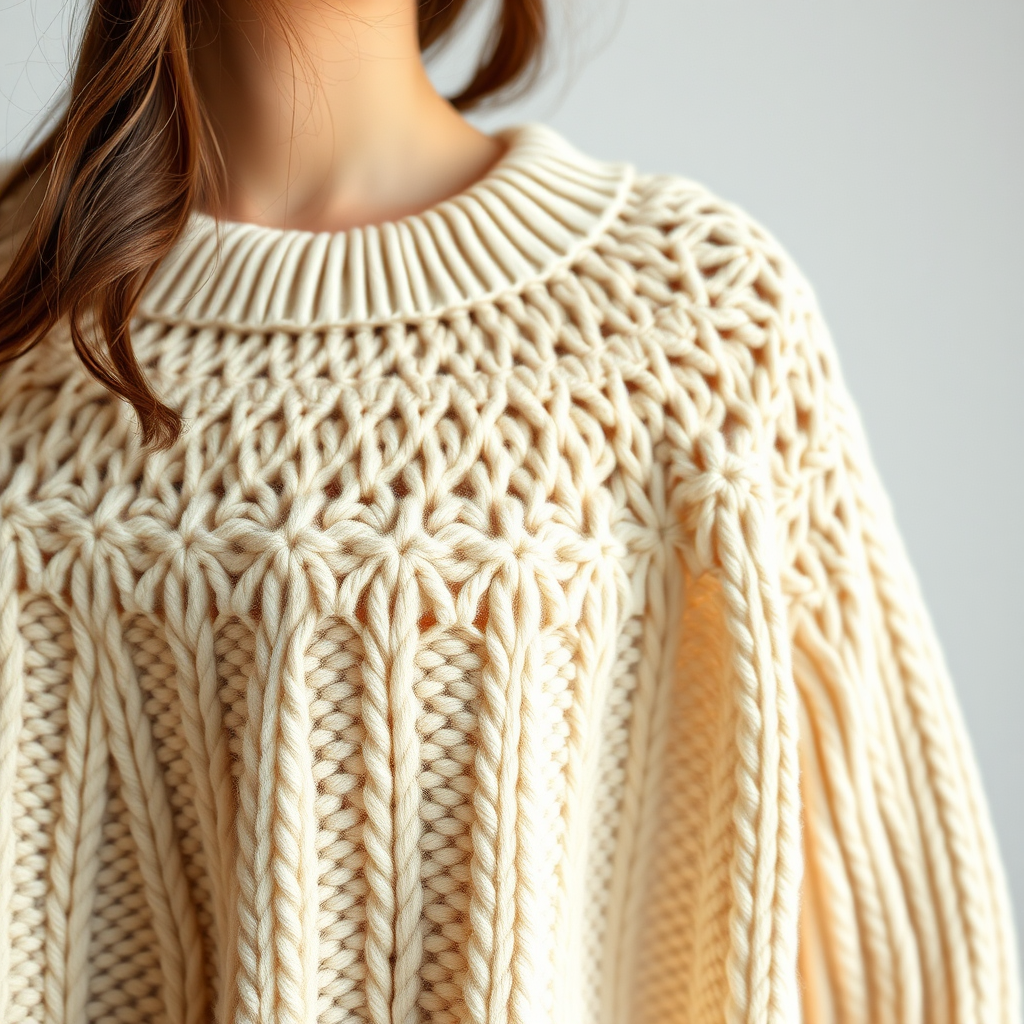
Welcome to the Chunky Cable Knit Yoke Sweater Pattern! This beautiful knitted sweater features a stunning yoke design with intricate cable patterns and a cozy ribbed neckline. Perfect for chilly days, this piece combines elegance with warmth, making it a must-have addition to your wardrobe. Whether you're a beginner or looking to refine your skills, this pattern is designed to guide you through each step with ease.
Materials Needed
- Yarn: Super bulky yarn (choose a color that inspires you!)
- Needles: US 15 (10mm) circular needles
- Stitch Marker: To mark the beginning of your round
- Tapestry Needle: For weaving in ends
- Measuring Tape: To check your gauge and dimensions
Step-by-Step Instructions
1. Casting On
Begin by casting on 80 stitches using the long-tail cast-on method. This method provides a stretchy edge that is perfect for the neckline.
2. Joining in the Round
Once you have cast on your stitches, carefully join them in the round. Make sure not to twist your stitches. Place a stitch marker at the beginning of your round to help keep track.
3. Working the Neckline
Work in 2x2 ribbing (knit 2 stitches, purl 2 stitches) for 2 inches. This ribbing will create a snug and comfortable neckline.
4. Transitioning to the Yoke Pattern
After completing the neckline, transition to the yoke pattern. Follow this sequence:
- *Knit 2, Purl 2, Knit 2, Purl 2, Cable 4 Front (C4F)*
- Repeat from * to * around the entire round.
Continue this cable pattern for a total of 10 inches. Make sure to keep your tension consistent for a beautiful finish.
5. Dividing for Sleeves
Once you reach 10 inches in the yoke pattern, it’s time to divide for the sleeves. Place 16 stitches on hold for each sleeve. You will continue working the body of the sweater in pattern for an additional 12 inches.
6. Binding Off
After completing the body, bind off all stitches. This will complete the main body of your sweater.
7. Working the Sleeves
Return to the stitches you placed on hold for the sleeves. Pick up and knit 40 stitches around the armhole. Work in the same yoke pattern for 18 inches, then bind off. Repeat this step for the second sleeve.
8. Finishing Touches
Finally, weave in all loose ends using a tapestry needle. To ensure your sweater has a polished look, block it to shape. This will help the cables pop and give your sweater a professional finish.
Conclusion
Congratulations! You have successfully created your very own Chunky Cable Knit Yoke Sweater. This piece not only showcases your knitting skills but also provides warmth and style for any occasion. Enjoy wearing your handmade creation or gifting it to someone special!


